Keycloak Basic Configuration for Authentication and Authorization
Managing authentication and authorization is an essential task in every good-designed web application or service. Keycloak makes it very easy and practical, letting us focus on the application business logic rather than on the implementation of security features.


In the previous article, we got to know Keycloak, an open source project for identity and access management developed by the RedHat Community. We went through how to install it, boot it and how to access the Keycloak Admin Console for the first time.
Continuing from where we left, in this new article I'd like to talk about how to configure Keycloak so that we can later use it for managing authentication and authorization for web applications and services. We'll learn how to create a new realm, define roles and add users.
Throughout this series, we're going to see more features and details about Keycloak, but I suggest you check the helpful and detailed official documentation for any doubt or curiosity.
1. Access Control, Authentication and Authorization
Managing authentication and authorization is an essential task in every well-designed web application or service. Keycloak makes it very easy and practical, letting us focus on the application business logic rather than on the implementation of security features.
Before going on, I think it is worth recalling and agreeing on the definition of some fundamental security terms. Rather than dwell on the topic here, I have written a dedicated article about access control and its main properties: identification, authentication and authorization. If you're interested in the topic, I suggest you read it before moving to the next section.
2. Create a New Realm
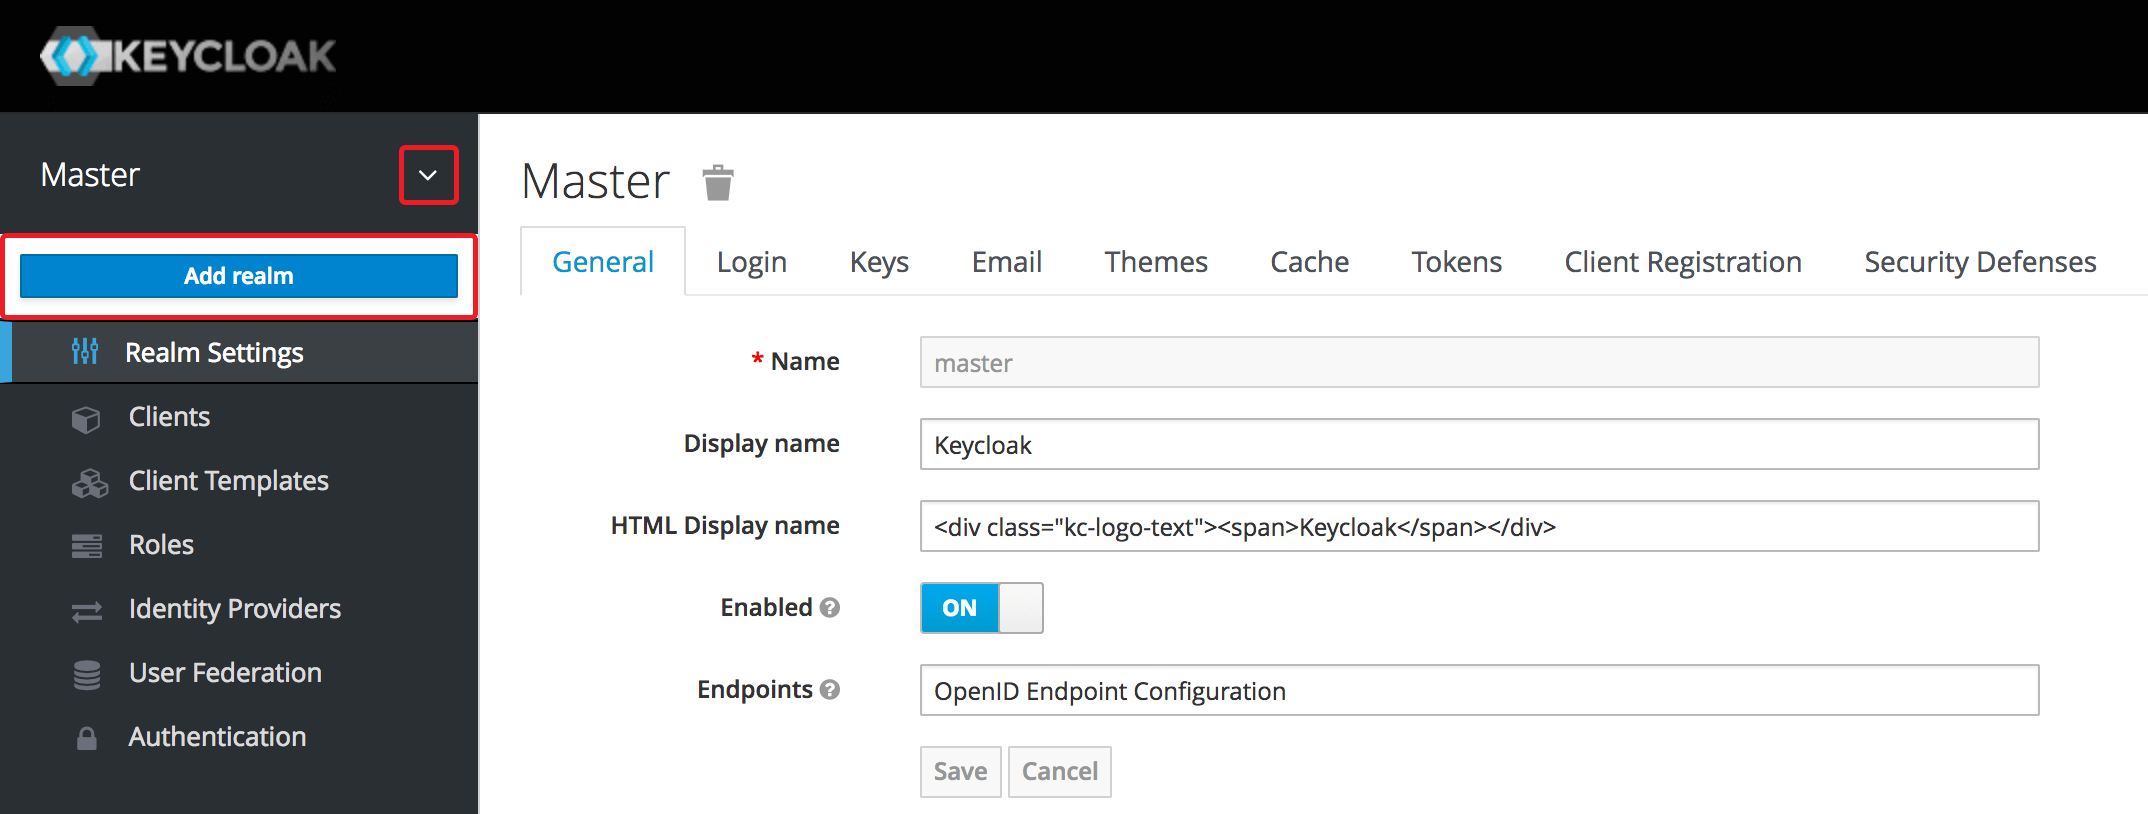
At the end of the previous article, we got to access the Keycloak Admin Console with our admin user by visiting: http://localhost:8180/auth/admin/. After logging in, we are inside the Master realm.
What is a realm? It's a domain in which we apply specific security policies. The Master realm is the parent of any realm we could create. We want to create a new realm, which will be a new security domain specifically for our web applications or services.
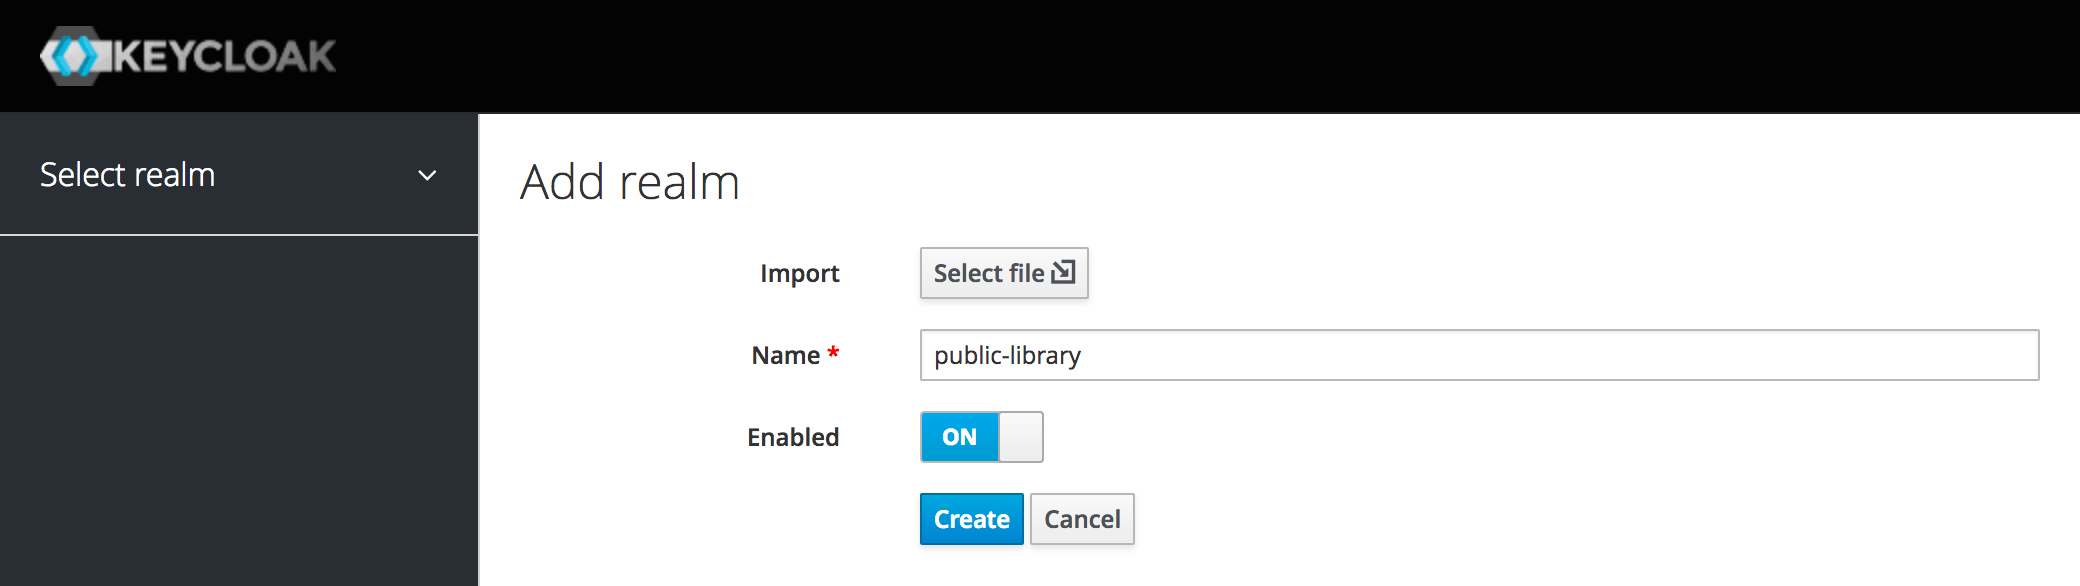
Throughout this series of articles, we're going to build and secure applications and services for a Public Library. That will be our realm, where we're going to define and enforce our security policies.
On the top left of the Admin Console, let's click the little arrow next to Master. It'll appear a drop-down menu where Keycloak shows all our realms and allow us to select any of them. Let's click Add realm.
On the new screen, we need to enter a name for the new realm (public-library) and confirm the operation by clicking the Create button.
That's it. We have created a new realm. For the moment, we can keep all the default configurations.
3. Define Roles for Users
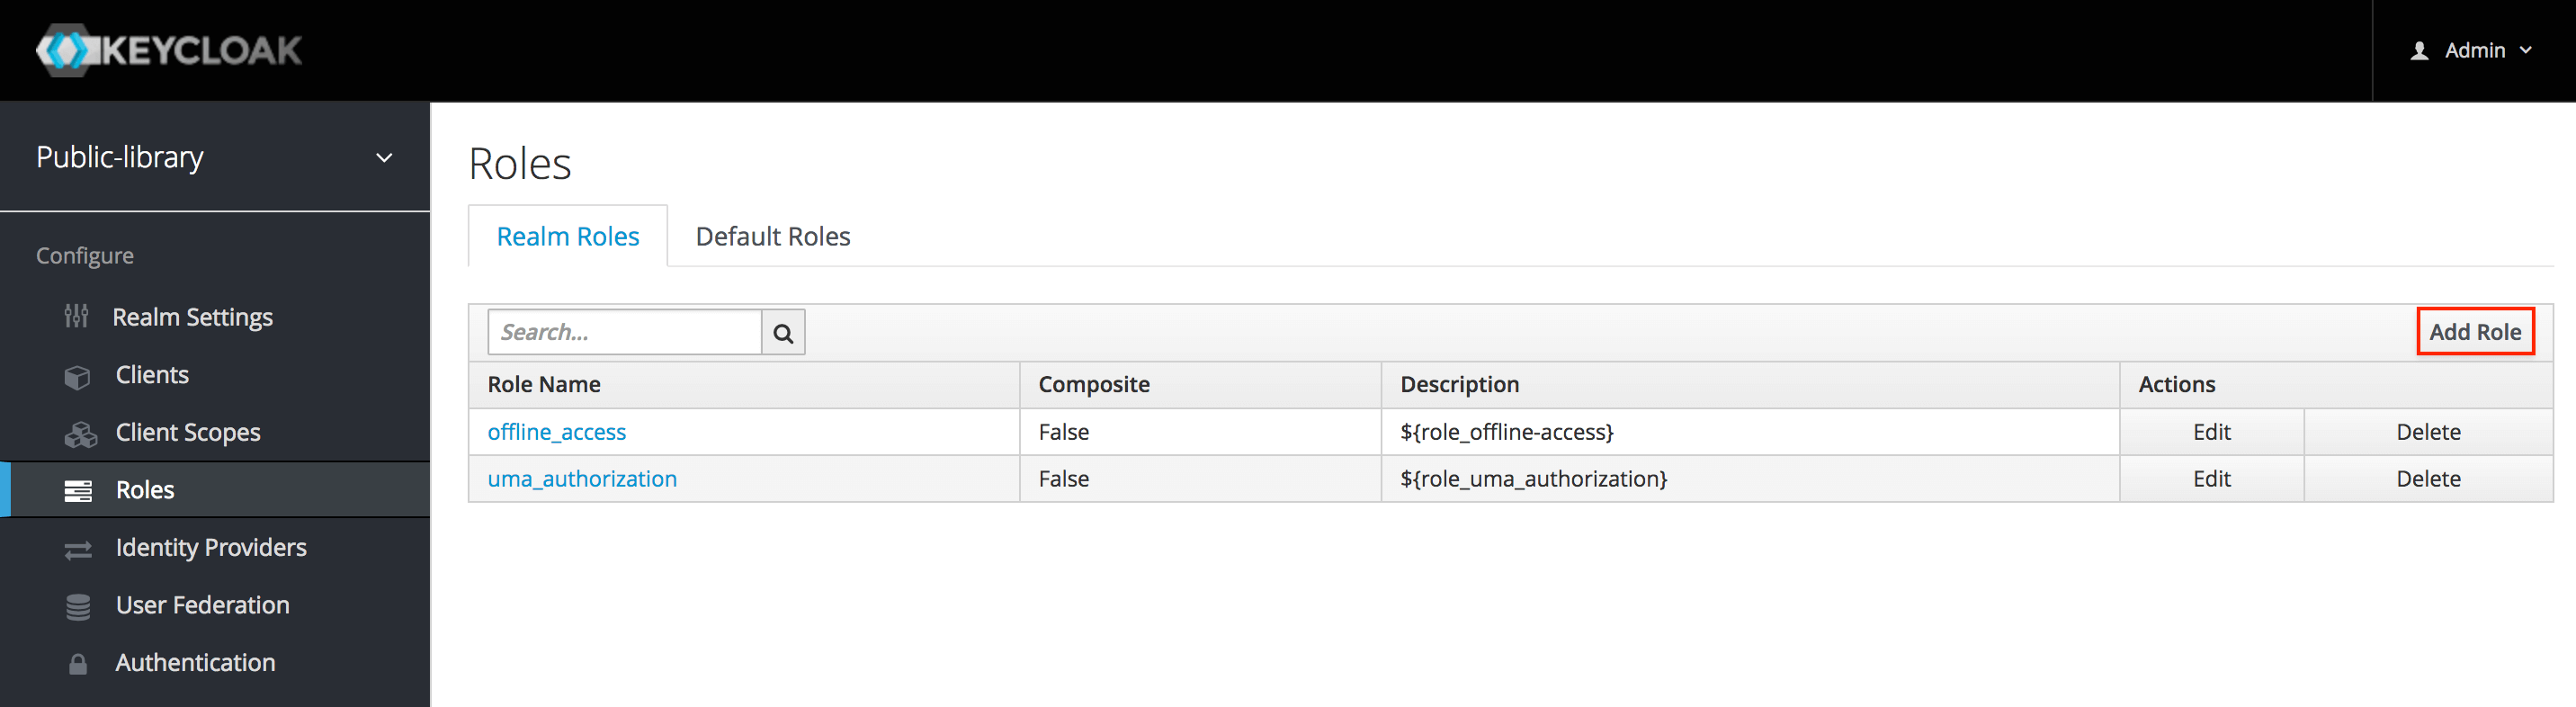
In the web application that we're going to build in the next article, there will be resources accessible according to two different security policies. We want to define a role for each of the two security policies inside Keycloak: a Member role for the members of the library and a Librarian role for the administrative staff.
To create a new role, we need to select Roles from the menu on the left, then on the far right of the screen click Add role. These will be realm-level roles. We could also create roles for a specific client application.
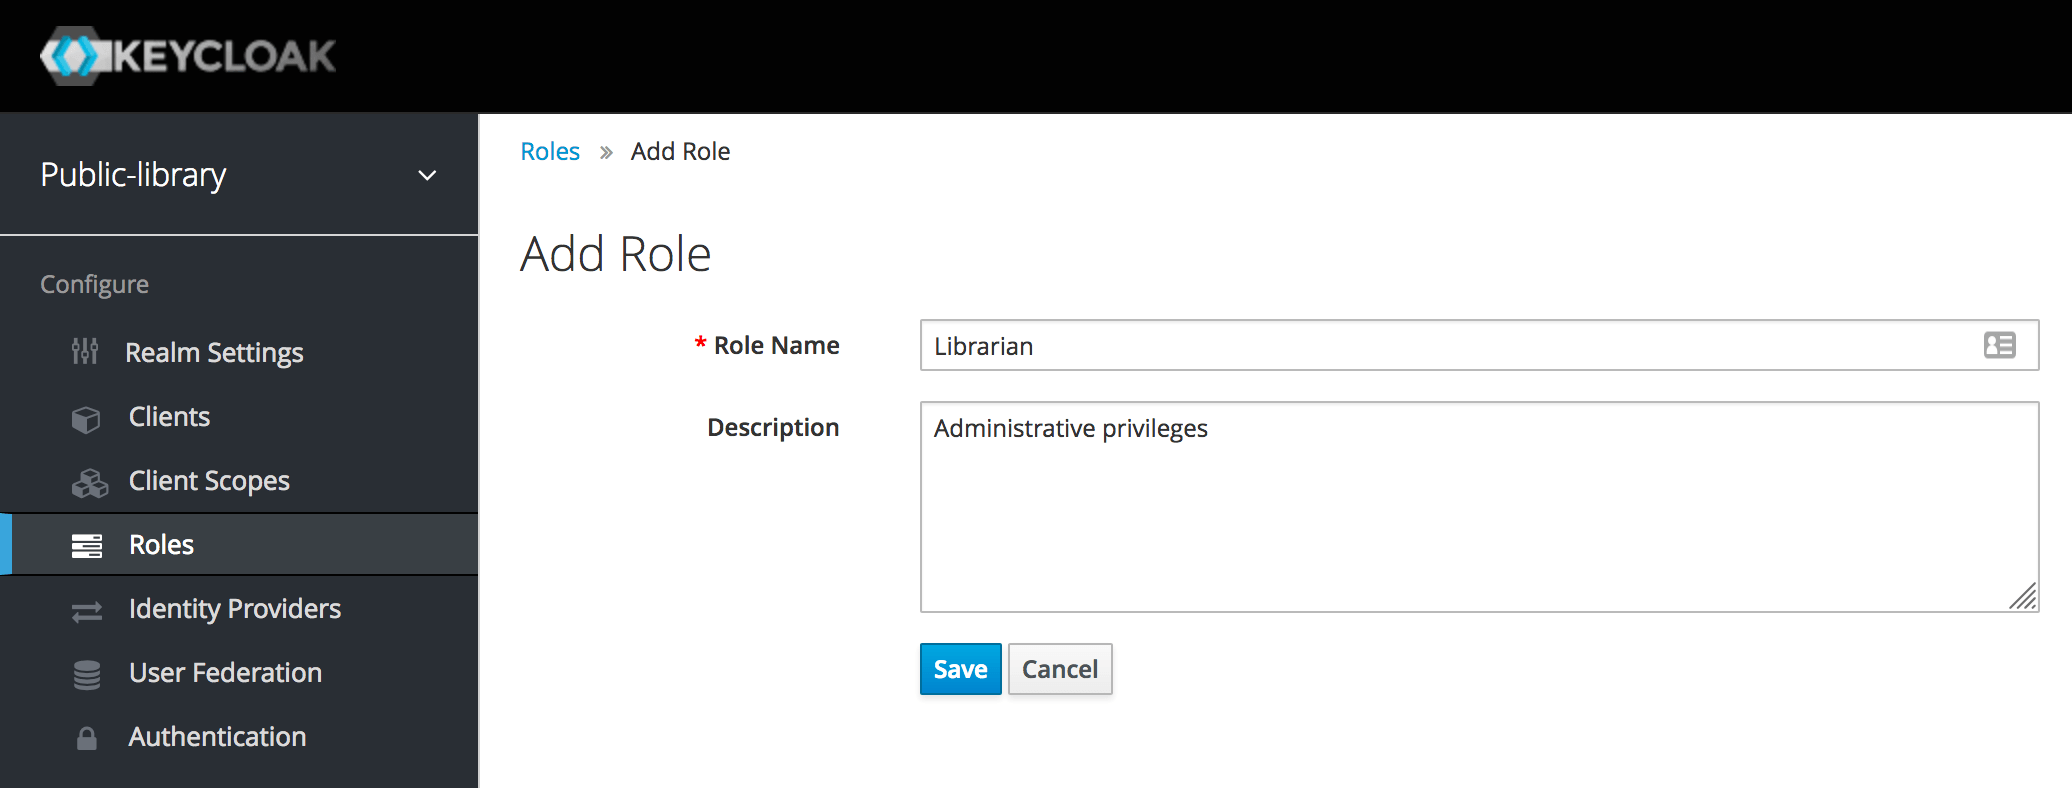
Now we can insert a name for the new role and an optional description. When done, let's click Save.
We want a Librarian to have both administrative and normal privileges. It's possible to turn the Librarian role into a composite role and automatically include the Member role when a Librarian role is assigned, so to grant it both kinds of privileges.
We can do that by going into the Roles area, selecting the Librarian role and toggling the Composite Roles option. In the new section appearing below the general fields, let's choose the Member role from the Available Roles and add it to the Librarian role by clicking Add selected.
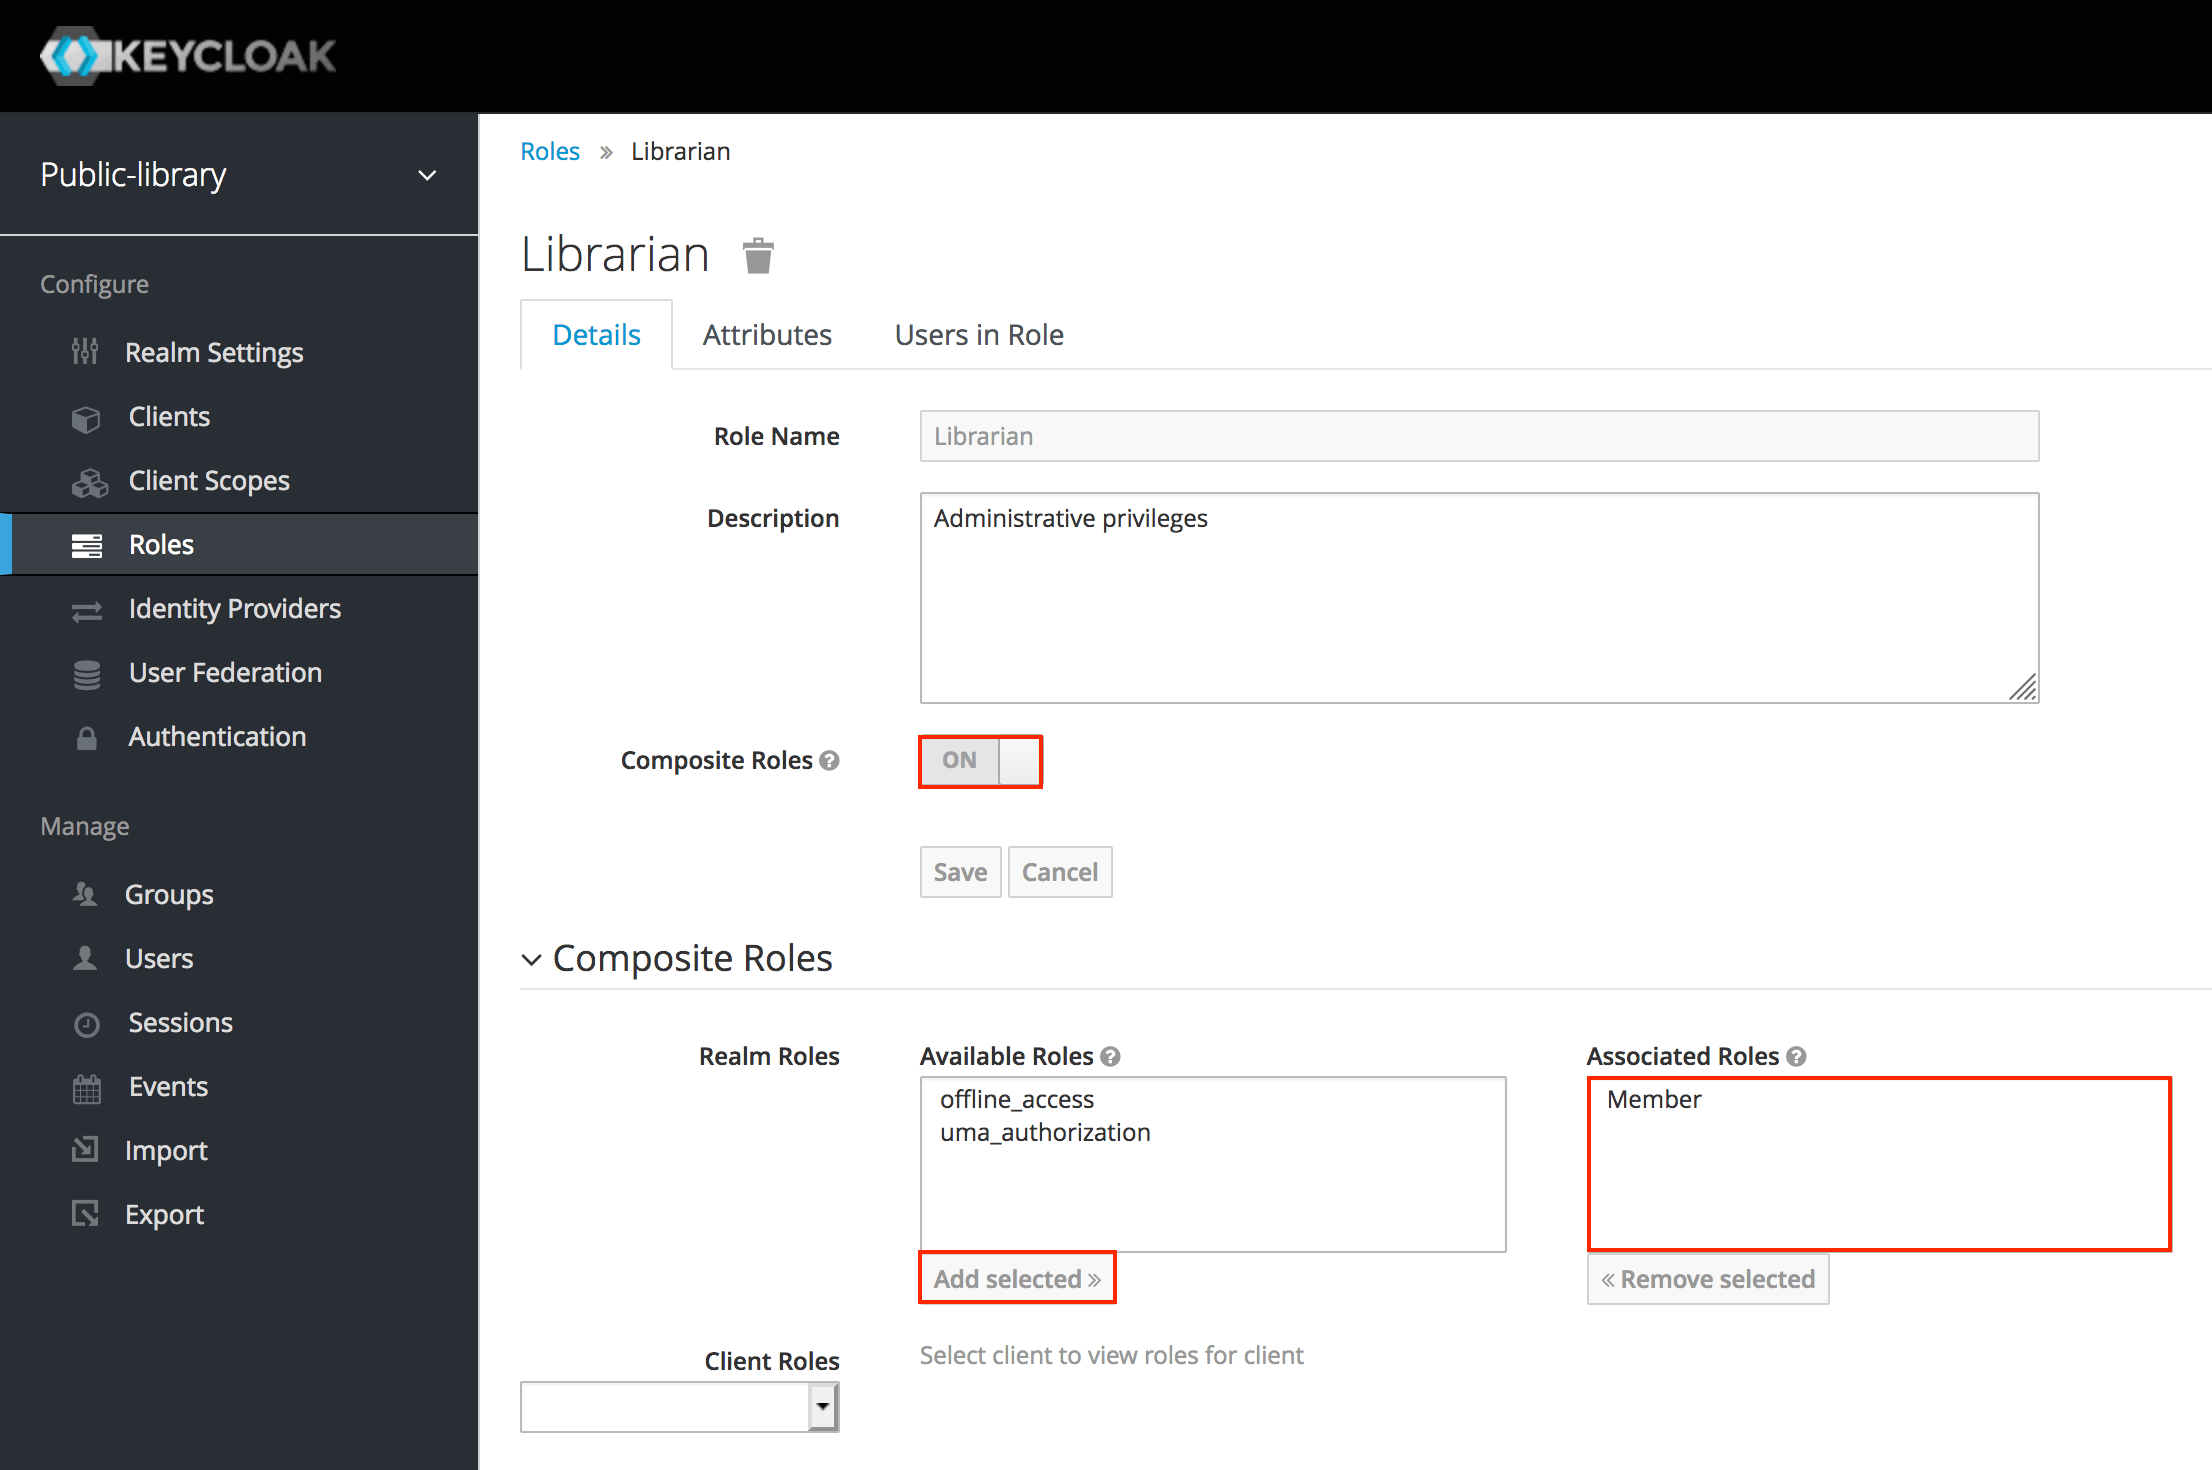
In this way, a user with a Librarian security role will have both administrative and normal privileges.
When building the web application, we're going to define access policies for each resource. Then Keycloak will help us with authorization, checking if the currently logged user has the proper role needed to access a specific resource.
4. Add Users
After having defined a new realm and two roles, we can finally add our first users. We're going to create a Librarian account for Irma and a Member account for Sheldon.
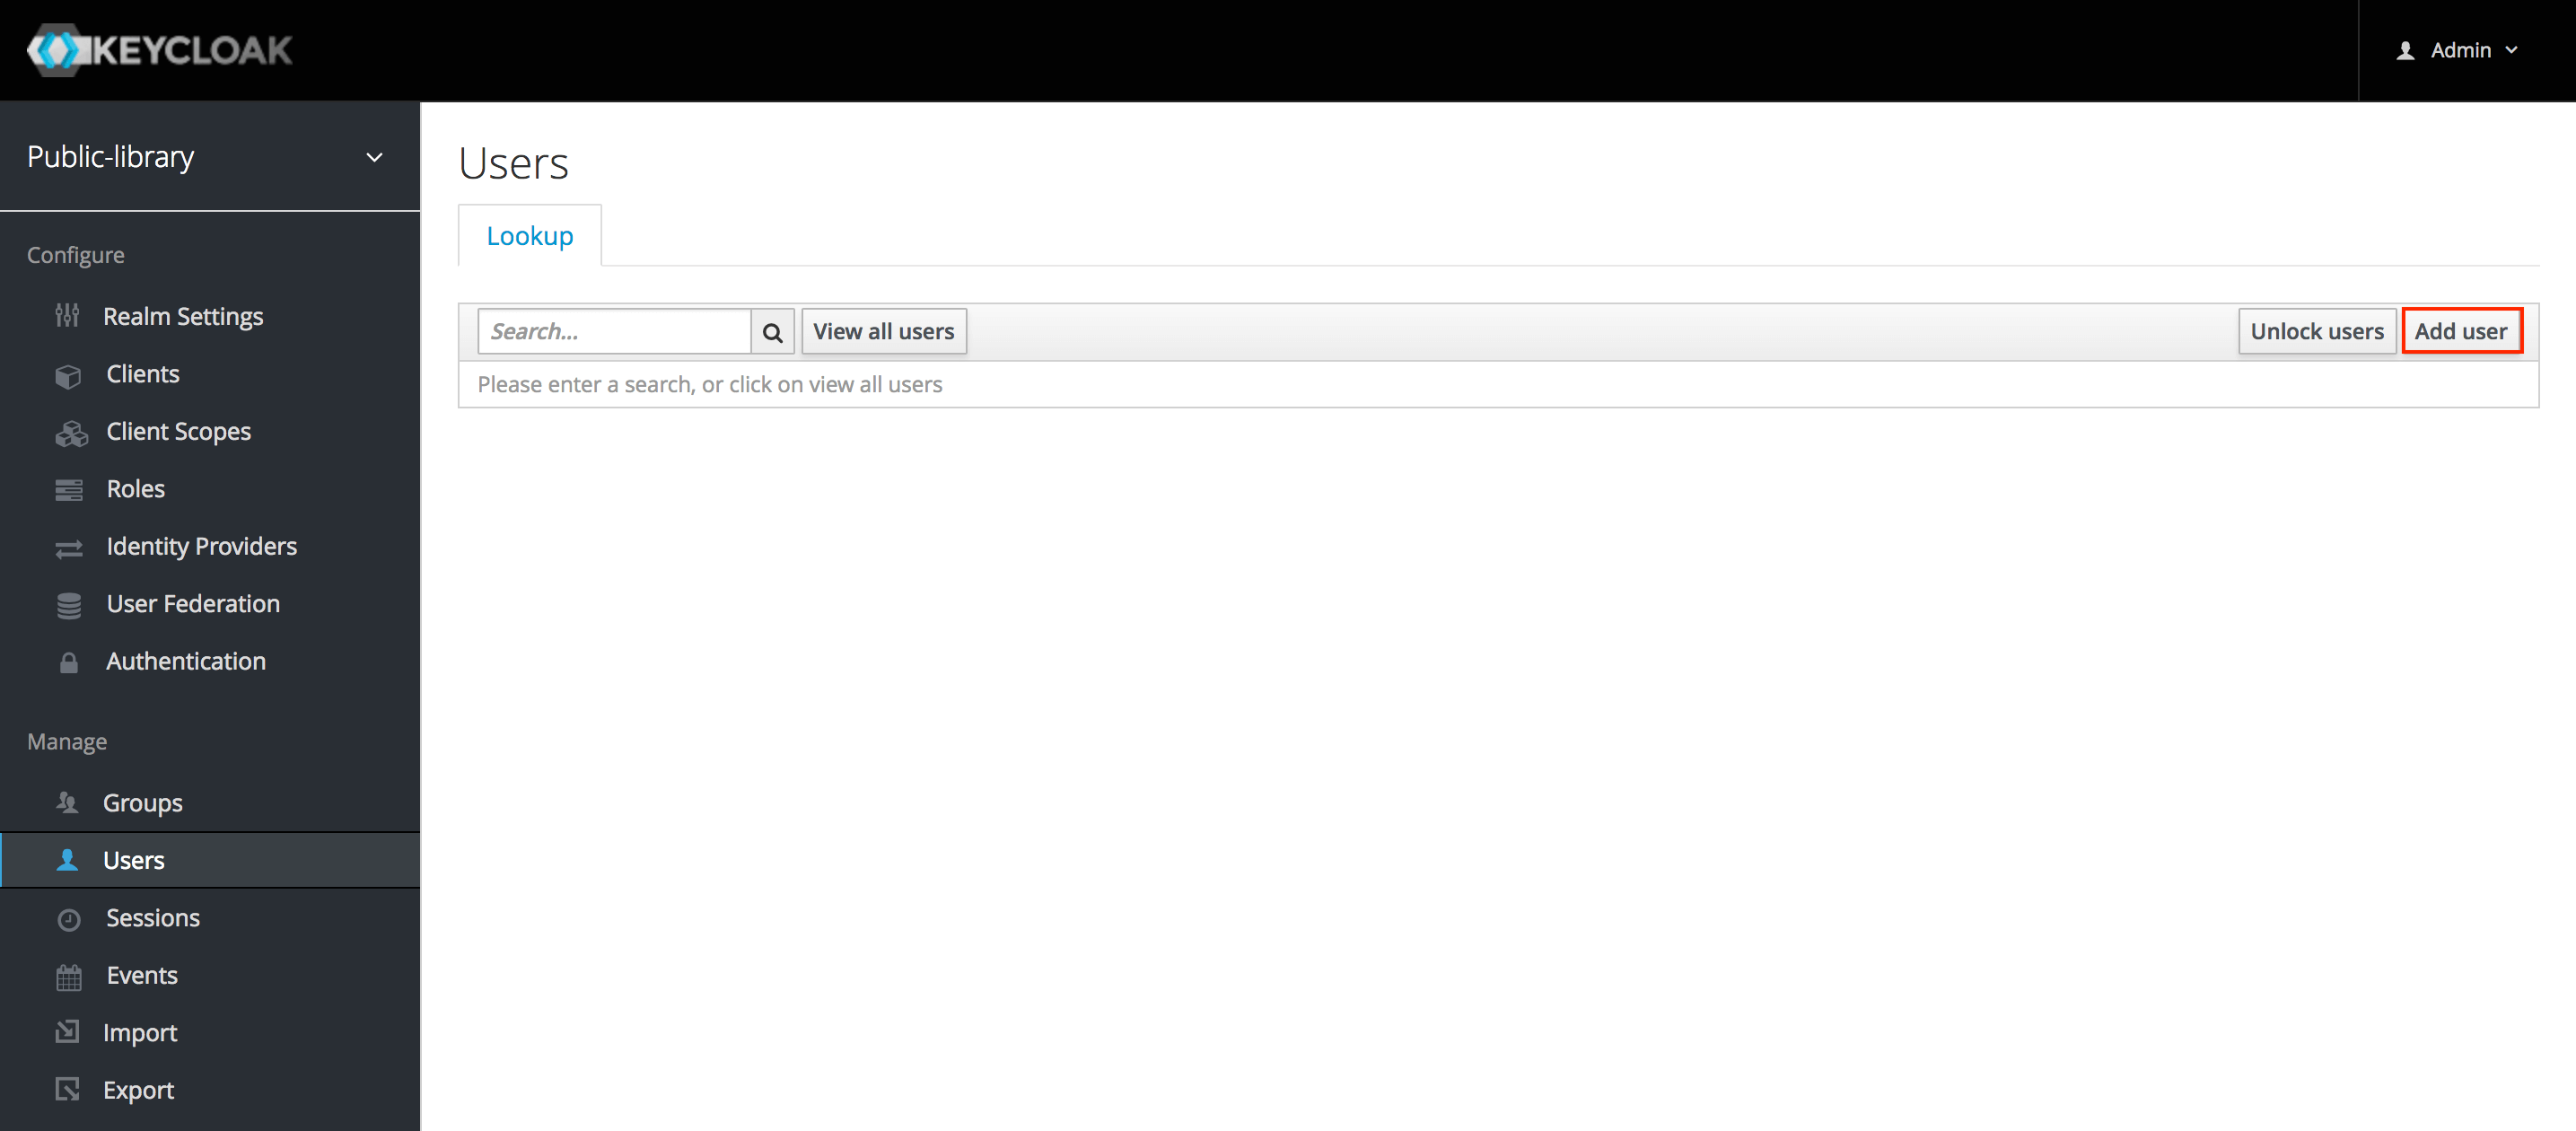
To create a new user, we need to go to the Users page and click Add user on the far right of the screen.
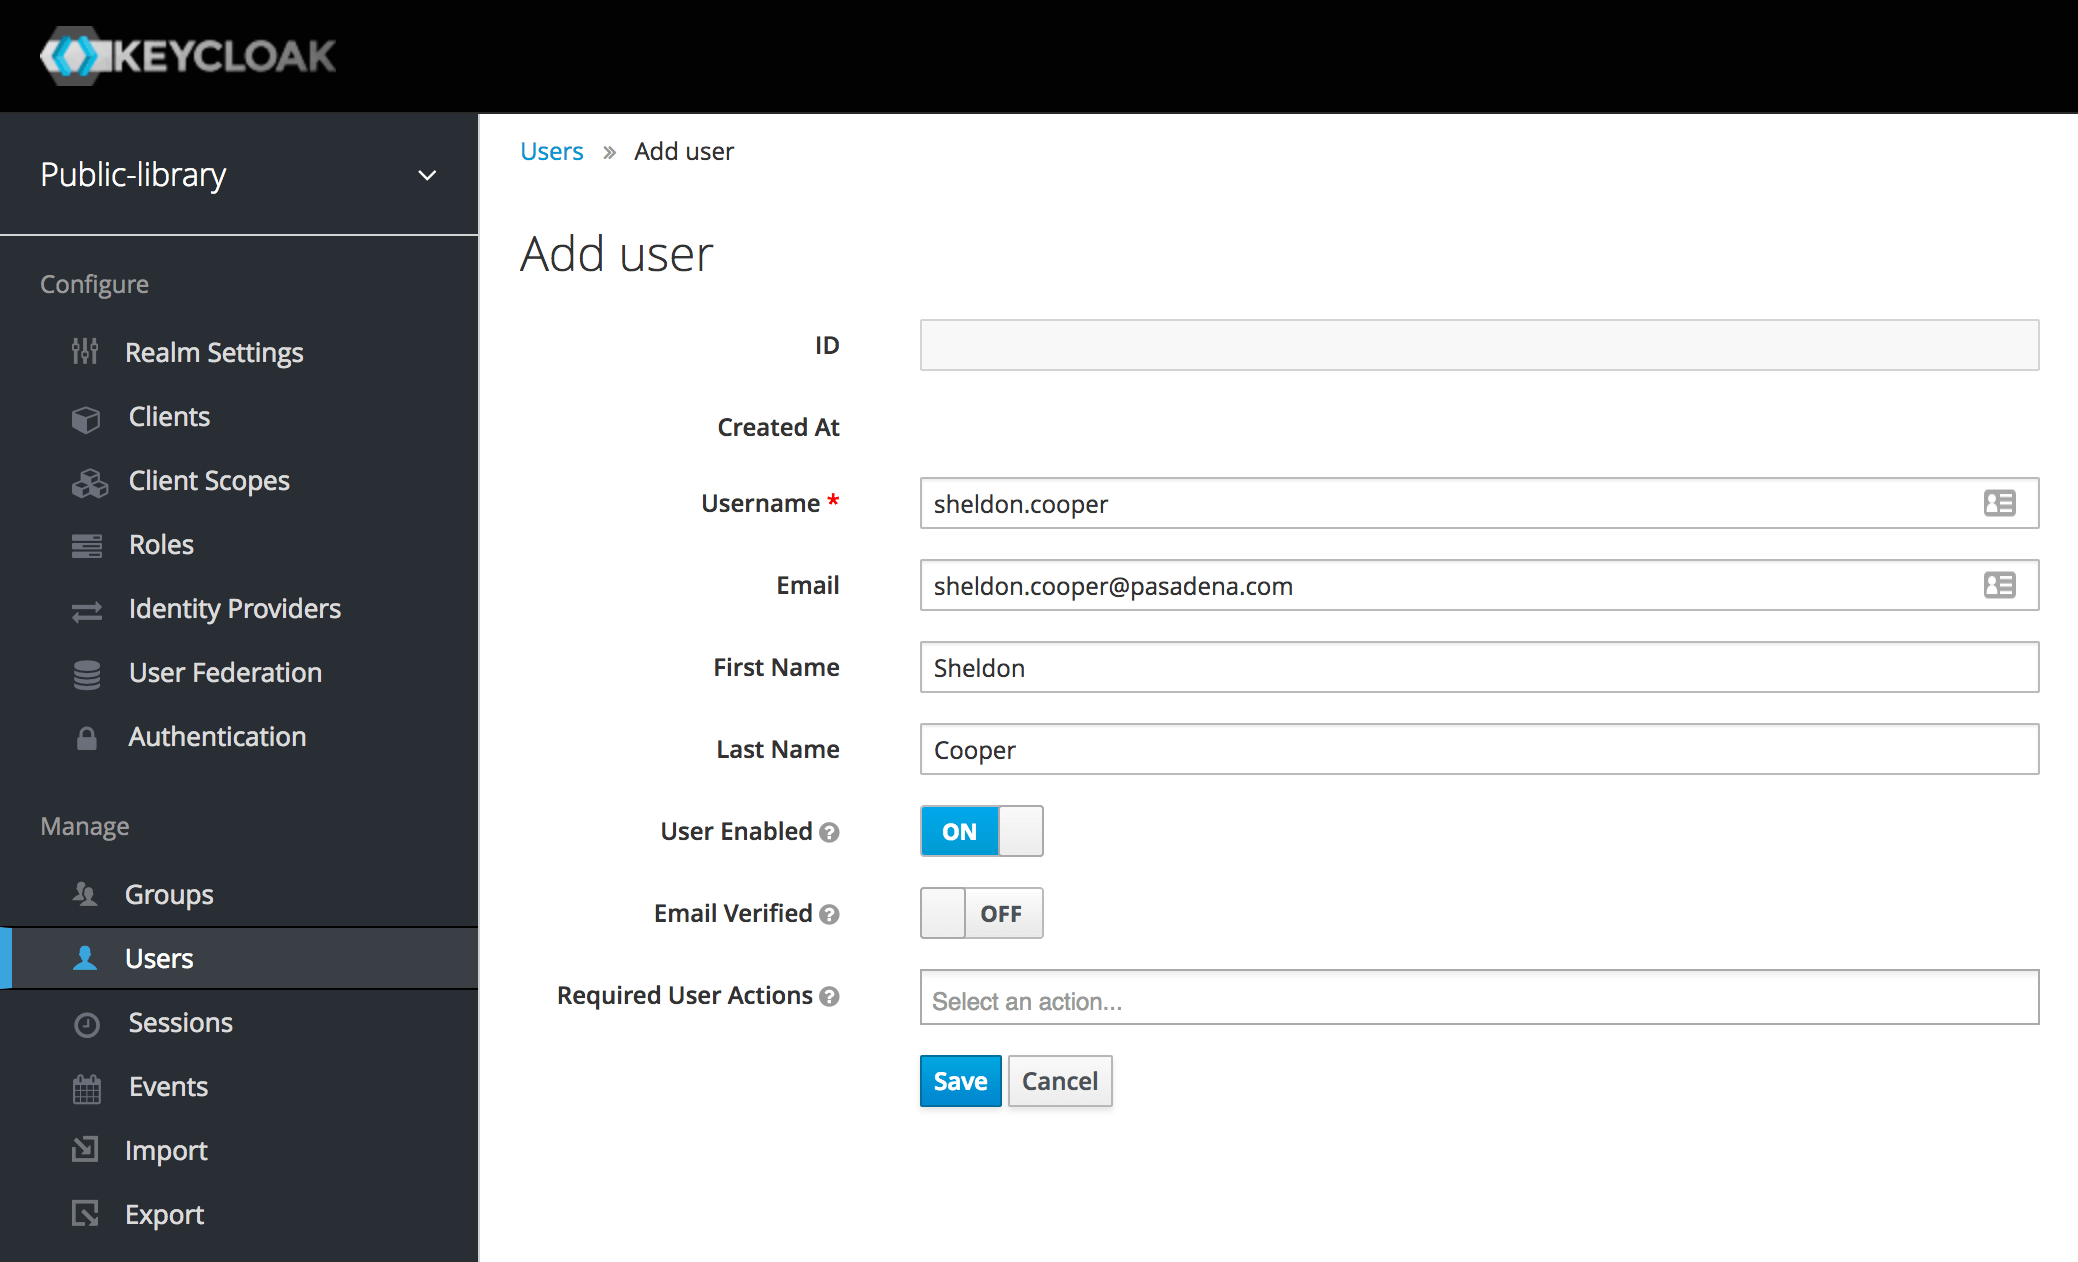
Let's fill the form in as we like (only the Username field is required). Then we can click Save.

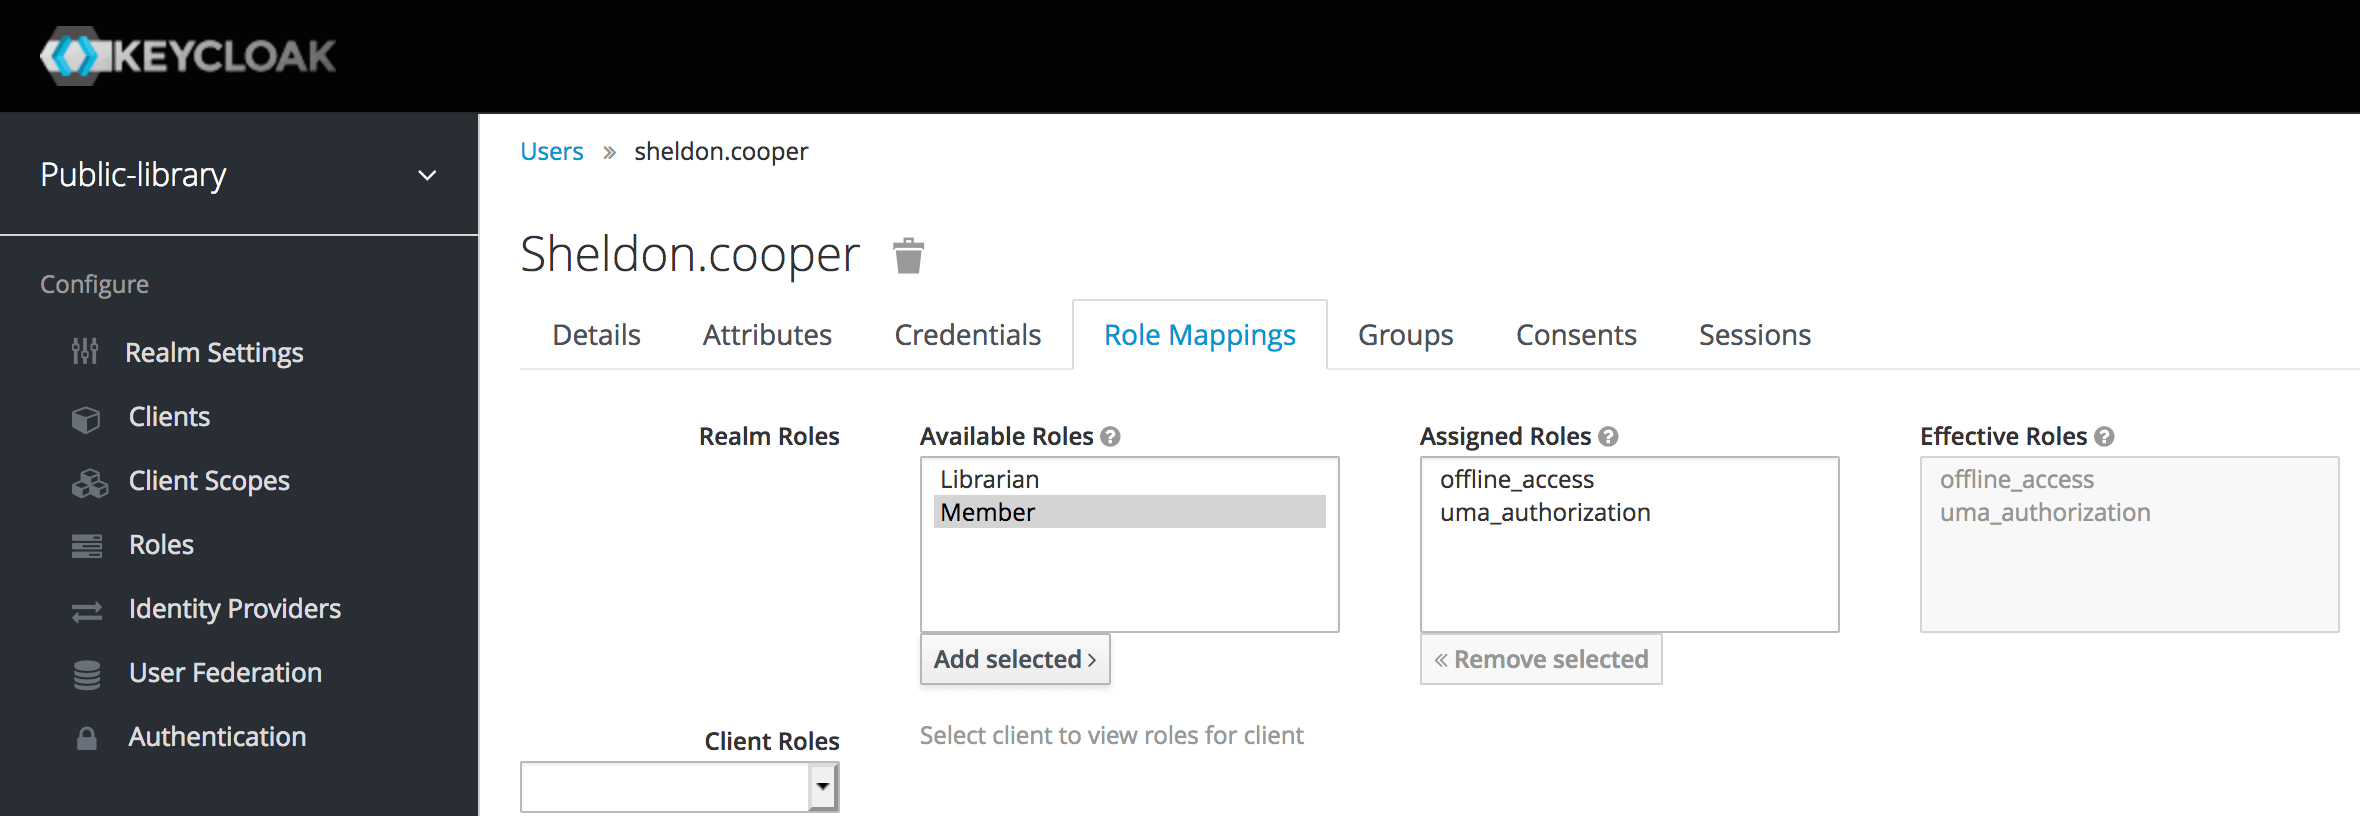
To assign a role and a password to a user, we need to go to the Users page and click on the user to whom we want to assign a role. If no user is shown, then we need to click View all users near the search box.
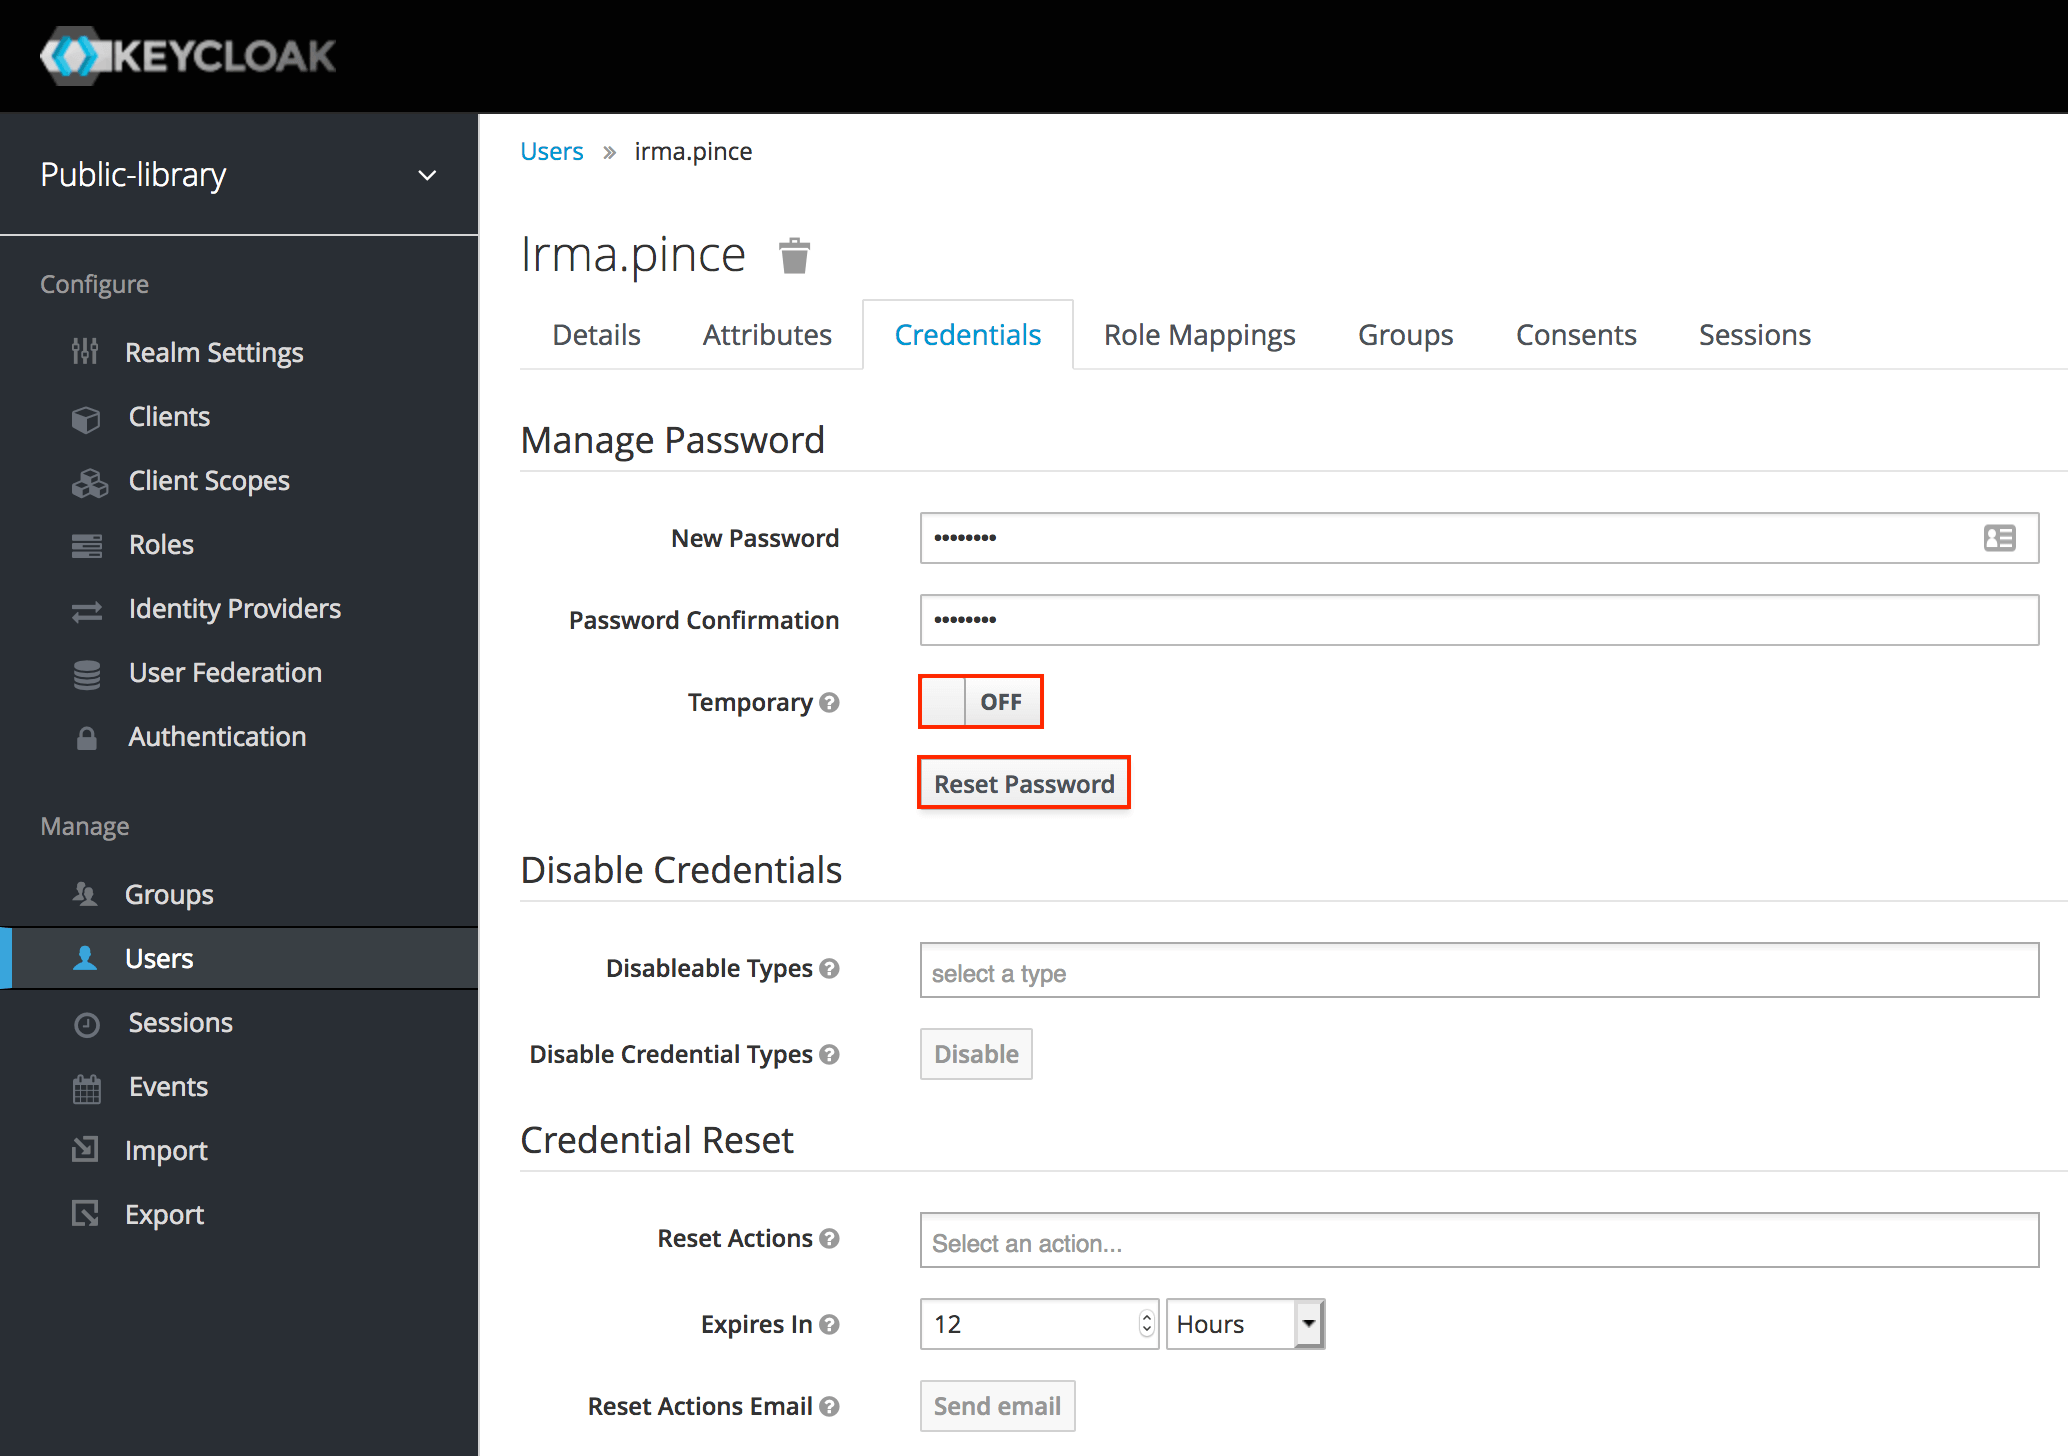
Let's go to the Credentials tab and insert a new password. For this series of tutorials, we don't want to require the user to change the password on their first login, so let's toggle the Temporary option to Off. After that, we need to click Reset password.
In a production environment, it's always a good idea enabling this option when we define a password on behalf of some user.
Finally, let's go to the Role Mappings tab, select one of the Available Roles and click Add selected.
We can also set some role as default so that each new user will automatically have it. To set Member as default role, for example, we can go to Roles > Default Roles and select a new default role from the Available Roles list just like we did in the previous step.
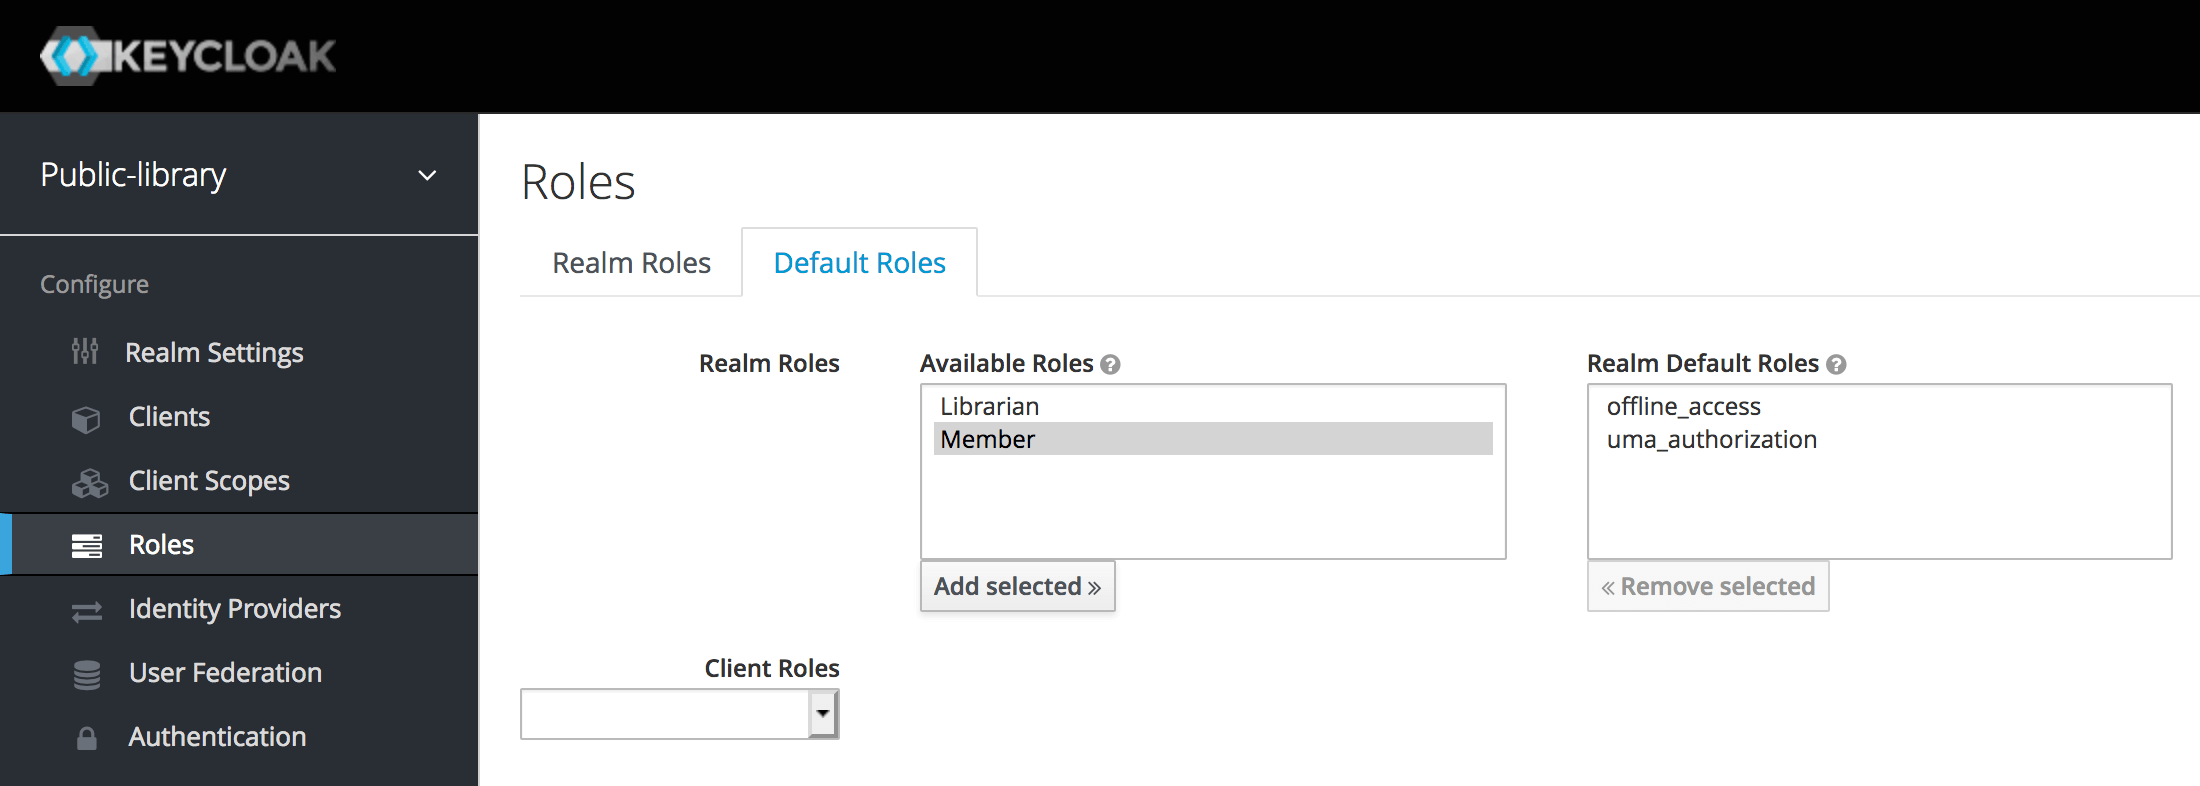
Now each new user will have a Member role by default.
5. User Account Service
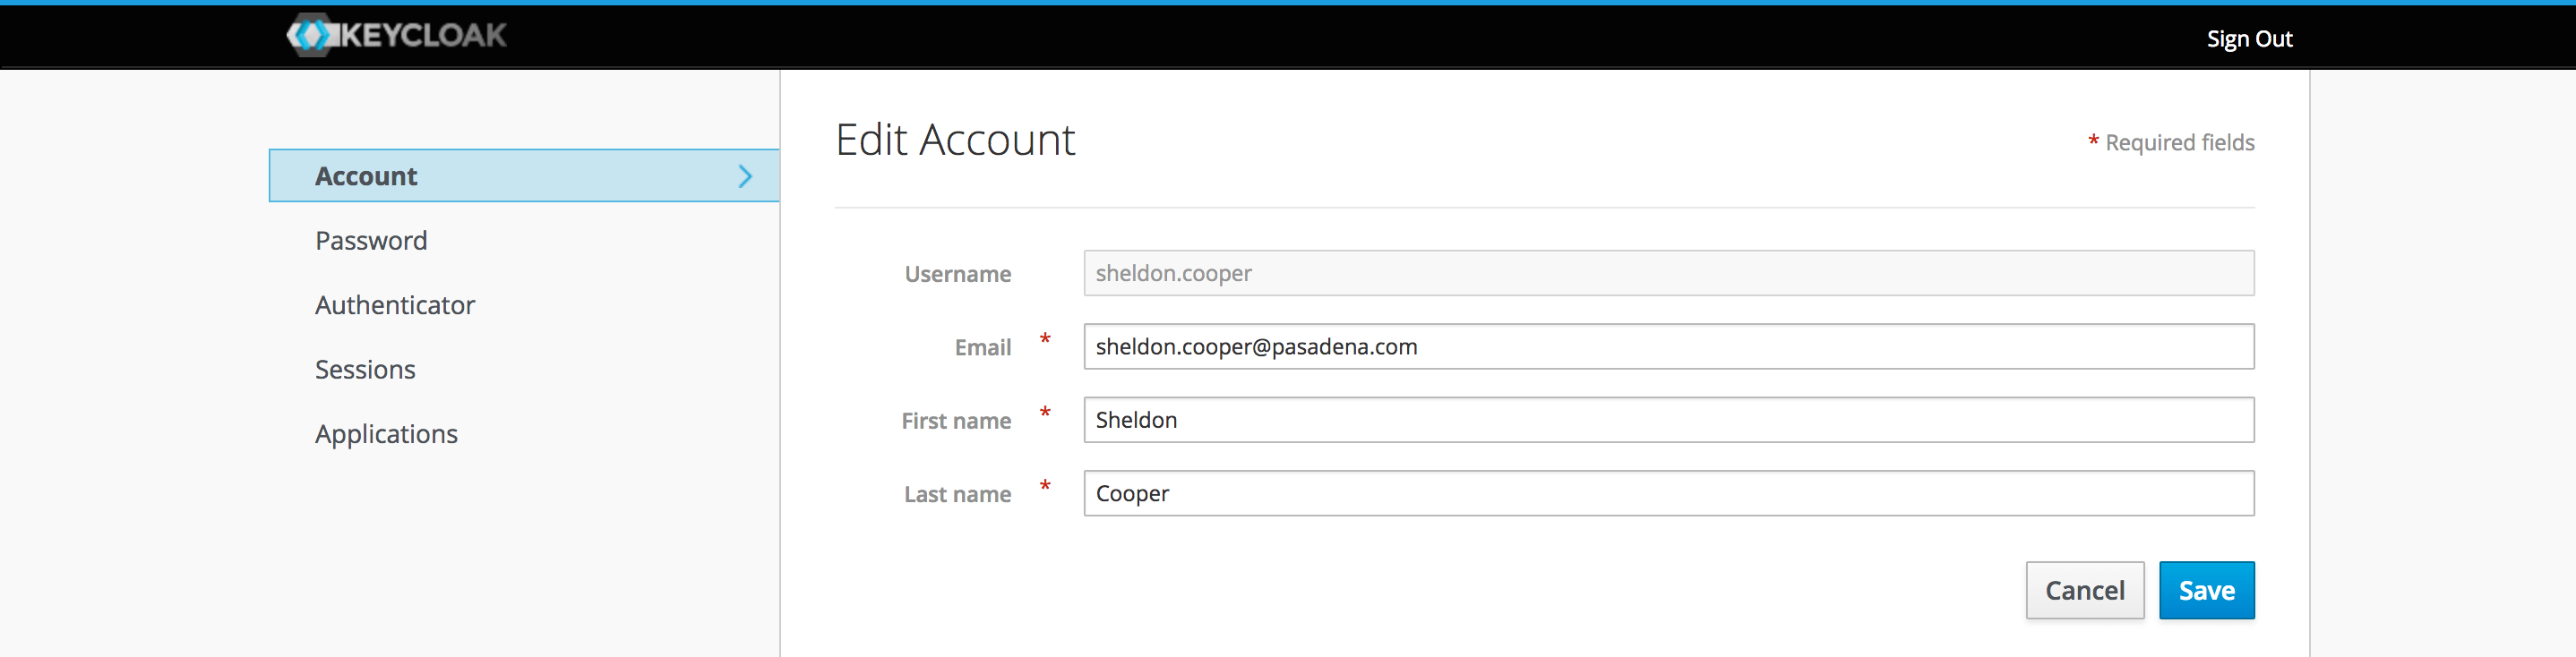
All users have access to the built-in user account service, where they can manage their own account.
The user account service for the Public Library realm we previously created can be found at http://localhost:8180/auth/realms/public-library/account/. We need to make sure to sign out of the Admin Console first.
In the login form, let's insert the username and password of one of the users we created in the previous step.

This service allows the user to choose a new password, enable the multi-factor authentication, review the session logs and check to which applications they have access.
Conclusion
In this post, we went through some basic Keycloak configurations. We learned how to create a new realm, how to create roles and define the default ones, how to add new users and assign them a password and a role.
Then we quickly looked at the Keycloak User Service, which each user can use to manage their account.
In the next article, we're going to talk about the different authentication options, the SSO protocols and also introduce the Keycloak client applications.
Last update: 16/05/2020
Keycloak Series
- Introducing Keycloak for Identity and Access Management
- Keycloak Basic Configuration for Authentication and Authorization
- Keycloak Authentication Flows, SSO Protocols and Client Configuration
Keycloak with Spring Series
- Securing a Spring Boot Application with Keycloak - A First Look
- Spring Security and Keycloak to Secure a Spring Boot Application - A First Look
If you're interested in cloud native development with Spring Boot and Kubernetes, check out my book Cloud Native Spring in Action.