Keycloak Authentication Flows, SSO Protocols and Client Configuration
In this article, I'm going to introduce the concept of authentication flows. Then, I'll briefly mention the two protocols Keycloak can use to provide its services: OpenID Connect (on top of OAuth 2.0) and SAML. Finally, I'll show you how to configure Keycloak clients.


Keycloak is an identity and access management solution that we can use in our architecture to provide authentication and authorization services, as we have seen in the previous posts in the series.
In this article, I'm going to introduce the concept of authentication flows and how we can configure and customise them. Then, I'll briefly mention the two protocols Keycloak can use to provide its services: OpenID Connect (on top of OAuth 2.0) and SAML. Finally, I'll show you how to configure Keycloak to make it work with our web application and services.
Authentication Flows
The starting point in our process to secure an application or a web service with Keycloak is to identify and authenticate the user. The sequence of actions a user or a service needs to perform to be authenticated, in Keycloak, is called authentication flow.
Keycloak provides already several authentication flows that you can customise in Authentication > Flows. Should you need something different, you can always create your own by choosing New in the far right of the screen.
From the dropdown list on the left, we can select flows for login, registration, credentials reset and other Keycloak workflows.
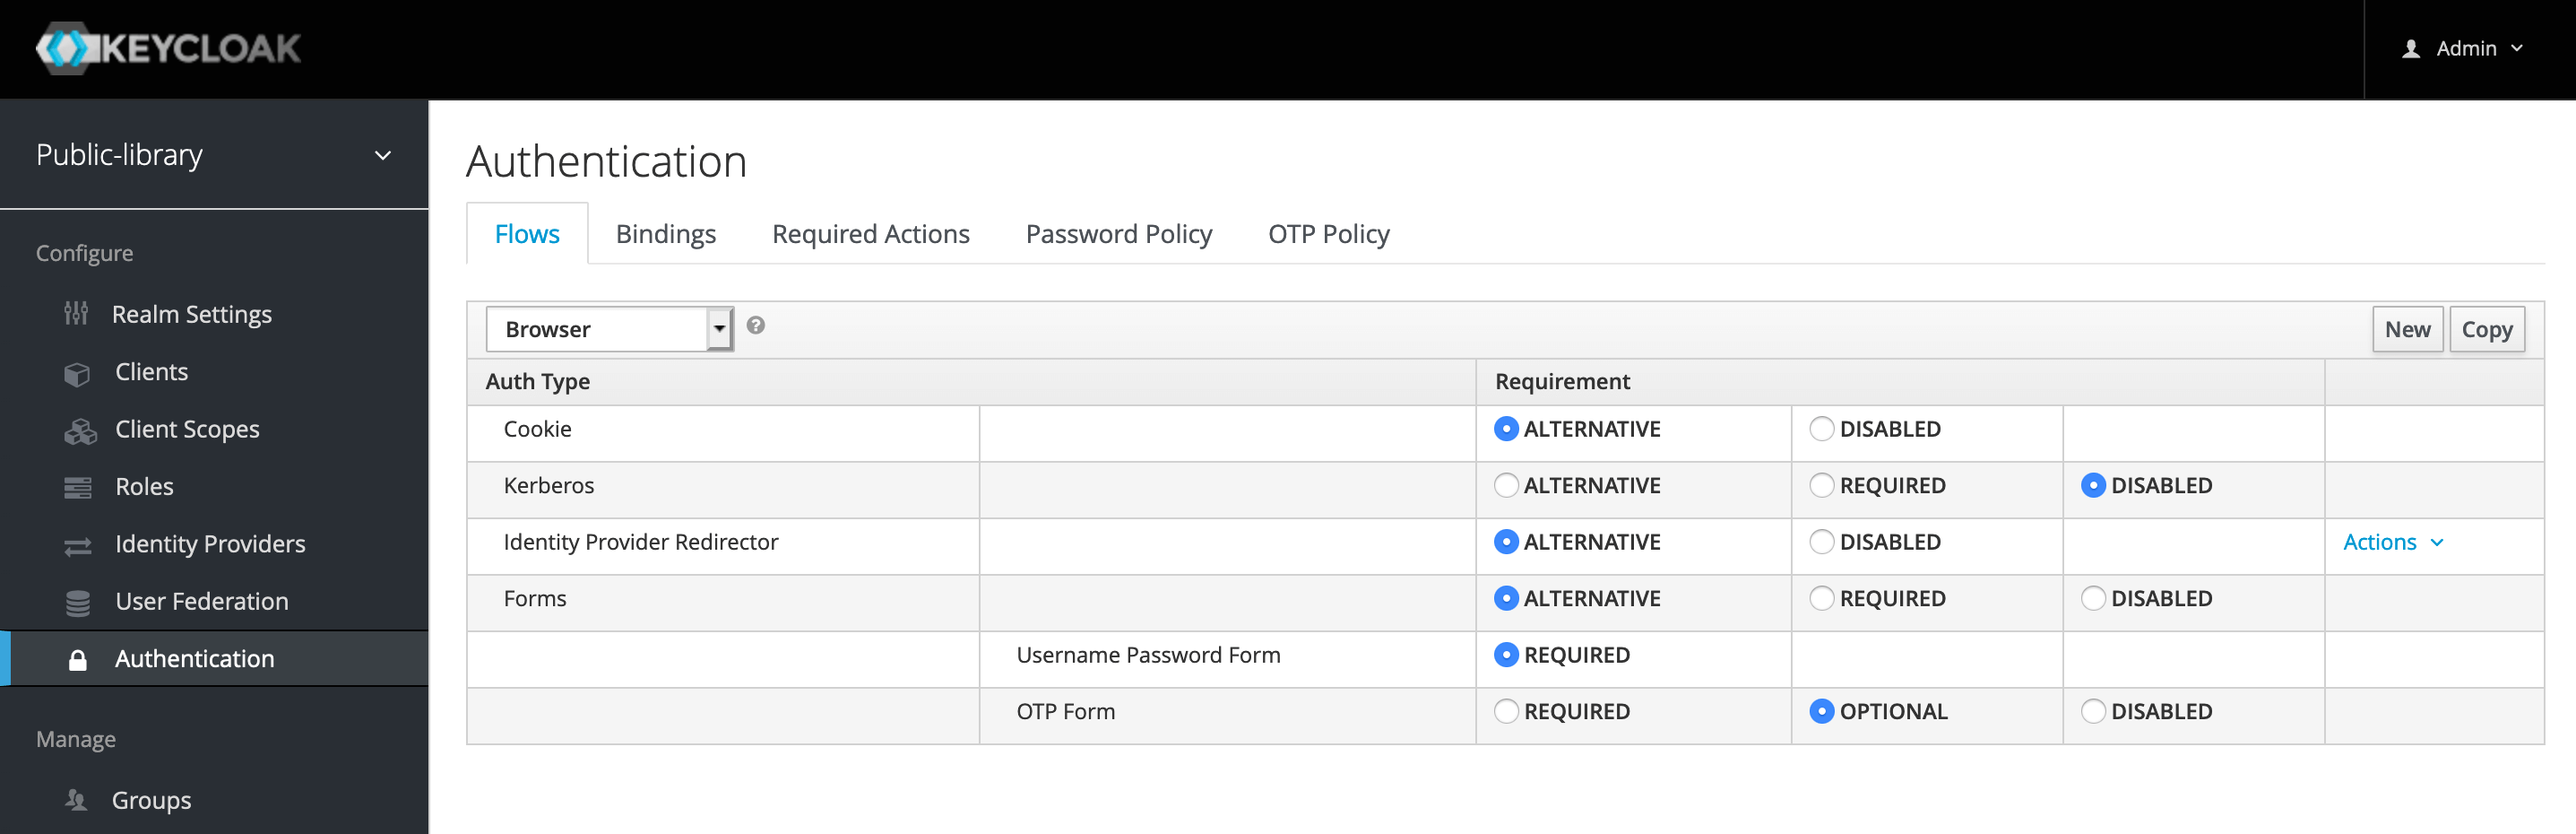
In the picture, for example, you can see the configuration for the Browser Authentication Flow. Cookie, Identity Provider Redirector and Forms are three alternatives supported by this flow. One of them is required to be successful for the user to be authenticated. On the contrary, Kerberos is disabled.
When the Forms authentication type is on, username and password are required as part of this subflow. Furthermore, in case the user has configured the OTP mechanism for their account, an extra authentication step is executed.
In this series, I'll be relying on the default authentication flows, so I will not change the configuration that often, but feel free to take a moment and explore the different options.
SSO Protocols
Communication between Keycloak and the clients asking it for authentication services happens according to one of the two main supported SSO (Single Sign-On) protocols: OpenID Connect and SAML.
OpenID Connect (OIDC) is the preferred method. It's a modern protocol built on top of the OAuth 2.0 framework. SAML is an older authentication protocol, which gained popularity in the world of SOAP services. It relies on XML documents containing assertions about the user, while OIDC makes use of JWT (JSON Web Token) in the form of identity tokens and access tokens.
Formalising the concepts standardised by the OAuth 2.0 framework, OIDC defines four main flows that can be used to authenticate a user:
- Authorization Code Flow for browser-based applications like SPAs (Single Page Applications) or server-side application;
- Implicit Flow for browser-based application, less secure than the previous one, not recommended and deprecated in OAuth 2.1;
- Client Credentials Grant for REST clients like web services, it involves storing a secret, so the client is supposed to be trustworthy;
- Resource Owner Password Credentials Grant for REST clients like interfaces to mainframes and other legacy systems which cannot support modern authentication protocols, it involves sharing credentials with another service, caution here.
In the next weeks, I will publish dedicated articles exploring in details each of these flows. Then, we will see how to adopt them in our web applications and services by using Keycloak.
Client Registration
Whenever we want to secure a web application or a web service with Keycloak, we need to create a client. What is a client?
Clients are entities that can request authentication of a user.
So, a client represents a web application or web service that wants to use Keycloak to authenticate and authorize users.
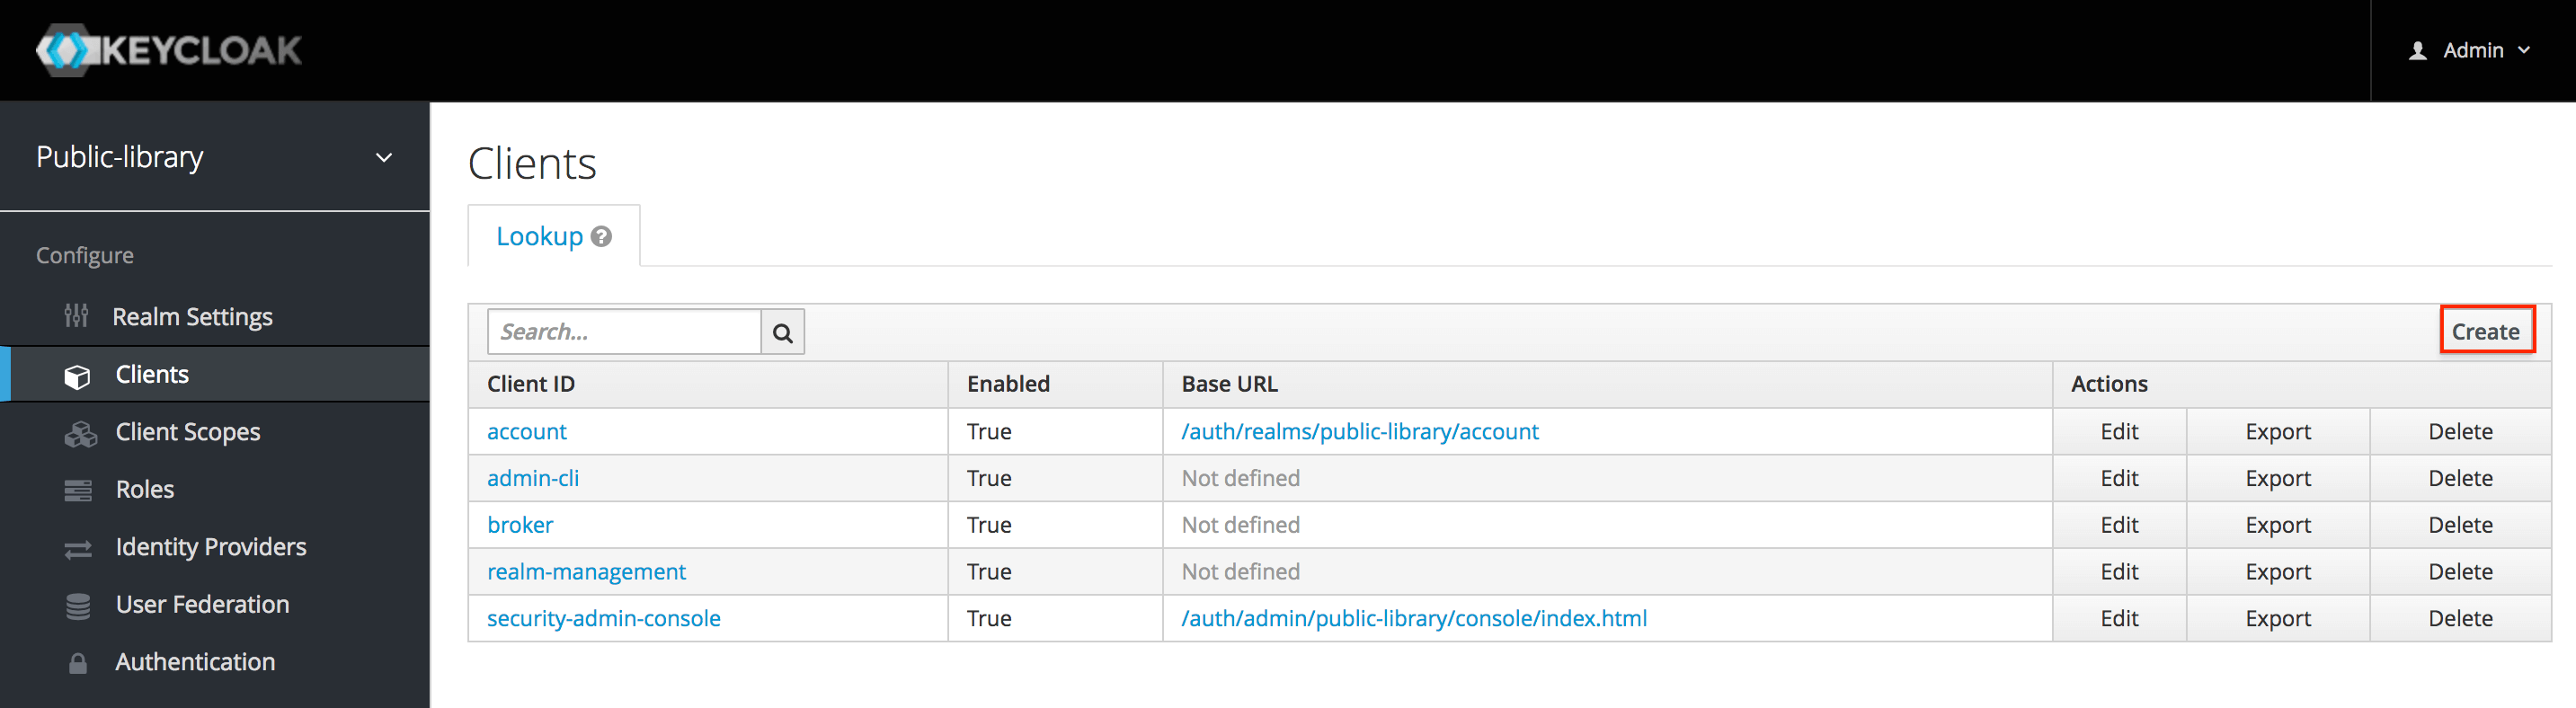
To create a new client, we need to go to Clients and then click Create.
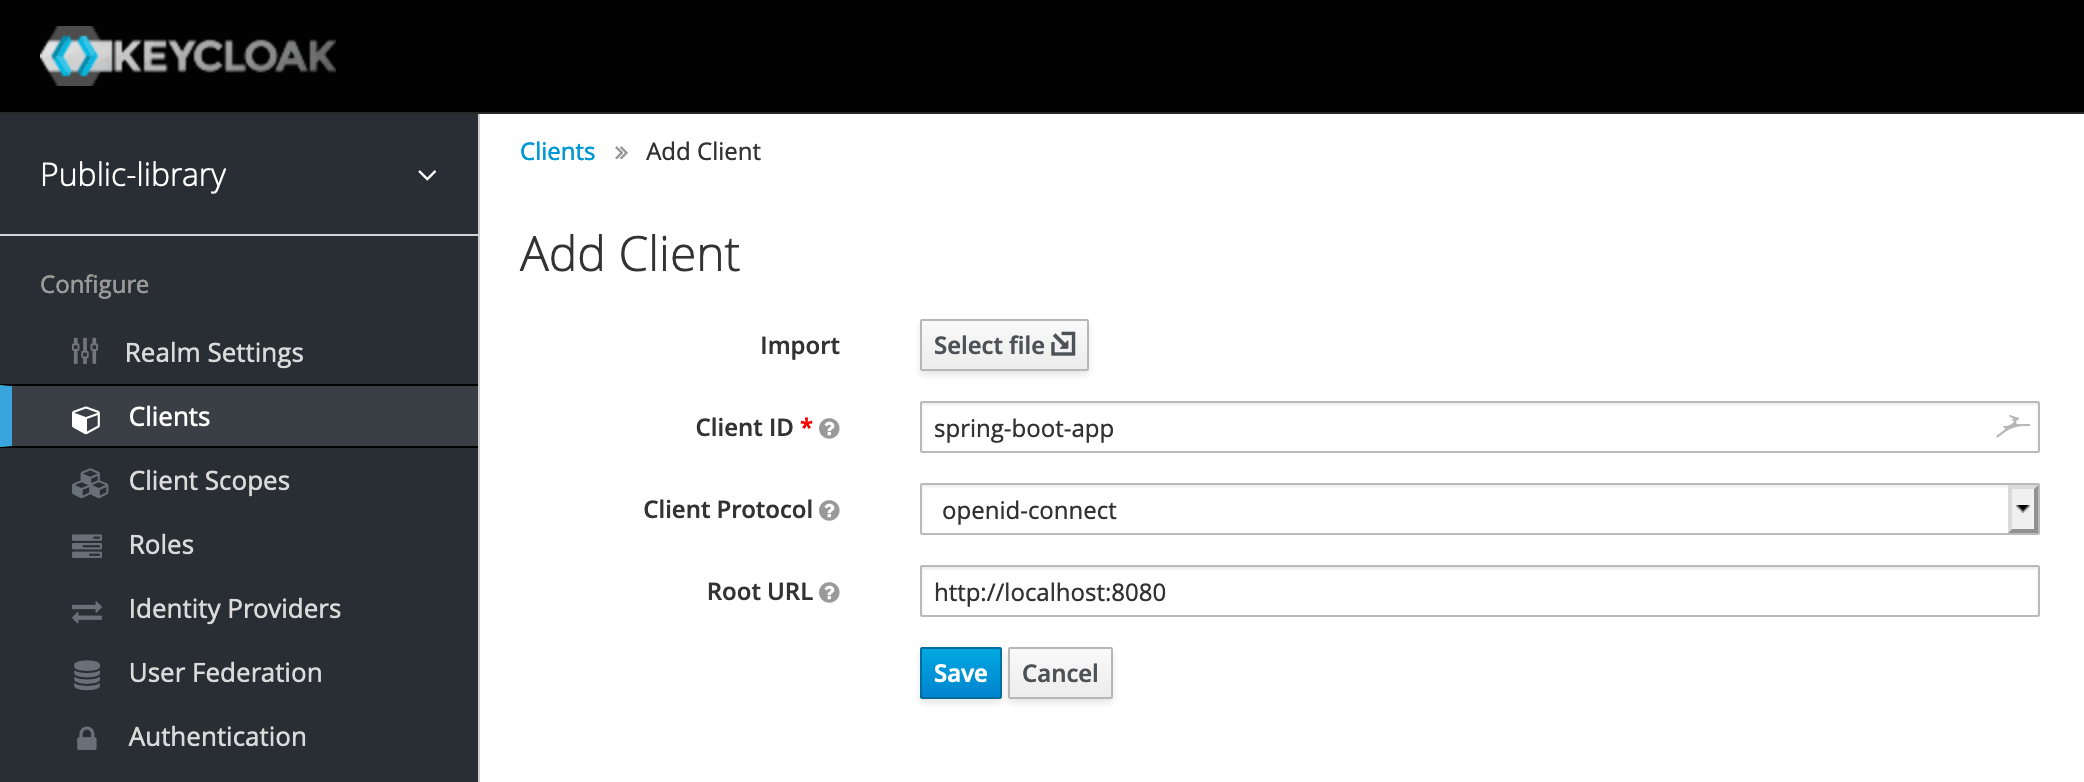
Now let's fill in the form to add a new client by providing the following information:
- Client ID: the string used to identify the client, like spring-boot-app;
- Client Protocol: we want to use OpenID Connect (OIDC), so we should choose openid-connect;
- Root URL: the root URL of our web application, for example, http://localhost:8080.
Once we have the client, a new page opens with further fields to configure it. Let's make sure we set the following options in this way:
- Enabled: ON;
- Access Type: public;
- Standard Flow Enabled: ON.
The Access Type option defines the type of the client. As explained in the documentation, "Public access type is for client-side clients that need to perform a browser login", that is exactly what we want.
Since the access to the client will be public, for security reasons, we must restrict it by setting the redirect URIs correctly. Keycloak automatically generates them from the Root URL, but we could add more of them. The more specific we are, the better.
Moreover, it's critical to enable HTTPS on our application to encrypt the data exchanged with the server and prevent third-parties from intercept sensitive data.
The Enabled option allows turning on and off the client for requesting authentication.
The Standard Flow Enabled property is used to activate the Authorization Code Flow as defined in the OIDC standard. It's the recommended protocol to use for authenticating and authorizing browser-based applications.
I think it could be helpful in illustrating the flow from the user point of view:
- A user visits the application on a browser and tries to access a protected resource;
- The application redirects the user to the Keycloak login page;
- The user enters their username and password;
- Keycloak authenticates the user;
- If the authentication succeeds, Keycloak redirects the user to the protected resource of the application.
In the background, Keycloak provides the application with two tokens as defined by the OIDC protocol:
- An Identity Token, which contains information about the logged user such as the username and the email.
- An Access Token, digitally signed by the realm, which contains access data such as the roles assigned to the logged user.
That's it. We have created a client that we can use to authenticate the users visiting our application. In a future articles, we're going through each OIDC Auth Flow and see how to configure Keycloak clients for each of them.
Conclusion
In this article, we have seen how Keycloak groups together all the actions to be performed during the authentication phase in the so-called authentication flows. Authentication and authorization services are provided to web applications and services which are configured as Keycloak clients, using either OpenID Connect or SAML as SSO protocol.
In the next article, we'll have a first look at how to use Keycloak to secure a Spring Boot application.
Last update: 16/05/2020
Keycloak Series
- Introducing Keycloak for Identity and Access Management
- Keycloak Basic Configuration for Authentication and Authorisation
- Keycloak Authentication Flows, SSO Protocols and Client Configuration
Keycloak with Spring Series
- Securing a Spring Boot Application with Keycloak - A First Look
- Spring Security and Keycloak to Secure a Spring Boot Application - A First Look
If you're interested in cloud native development with Spring Boot and Kubernetes, check out my book Cloud Native Spring in Action.