Getting Started with Spring Data MongoDB using Java Configuration
In this tutorial, I'll show you how to use Spring Data MongoDB to integrate a MongoDB NoSQL database into a Spring Boot application. Spring lets you use either Java configuration or XML configuration or a mix of the two. I'll use a pure Java configuration.

In this tutorial, I'll show you how to use Spring Data MongoDB to integrate a MongoDB NoSQL database into a Spring Boot application.
I'll use these technologies and tools:
- Spring Tool Suite (STS) 3.8.4.RELEASE
- Java 8
- Spring Boot 1.5.3.RELEASE
- Maven 3.3.9
- MongoDB 3.3.4
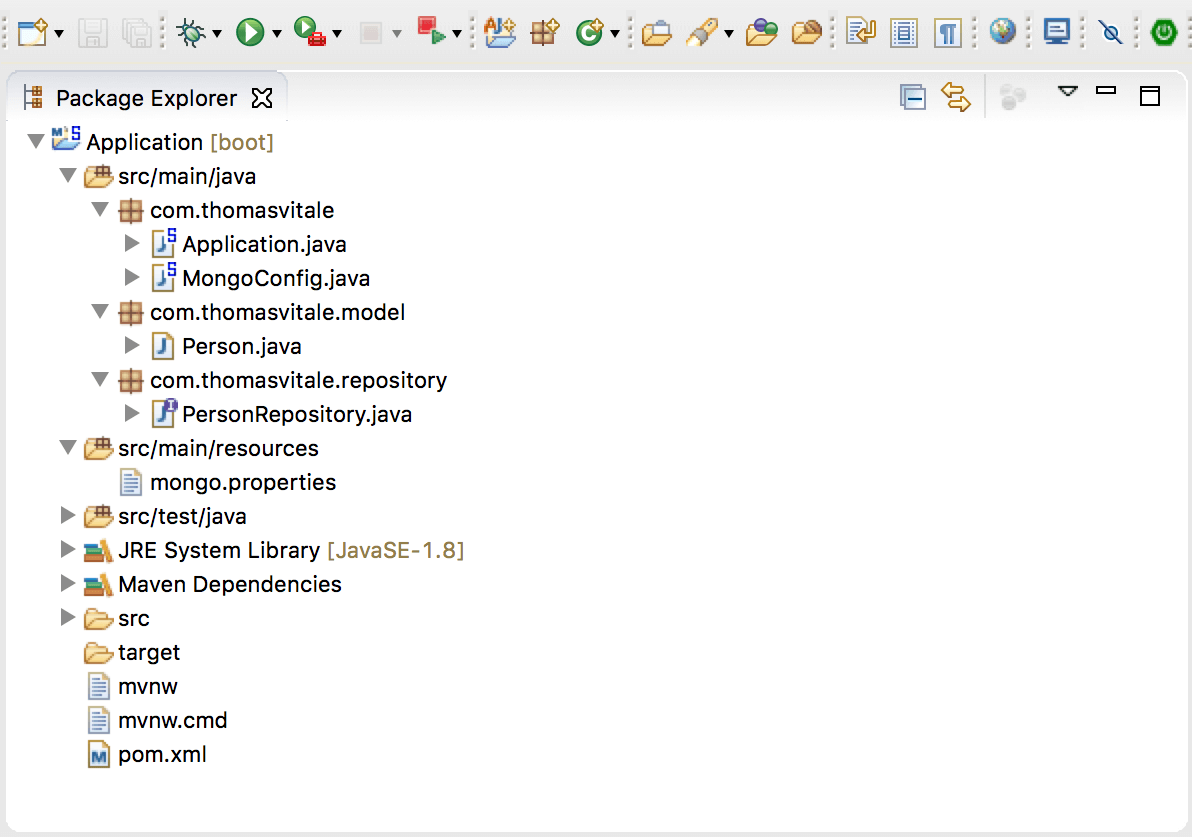
1. The Project Structure
The final folder structure of our project.
2. Create a new Spring Boot project
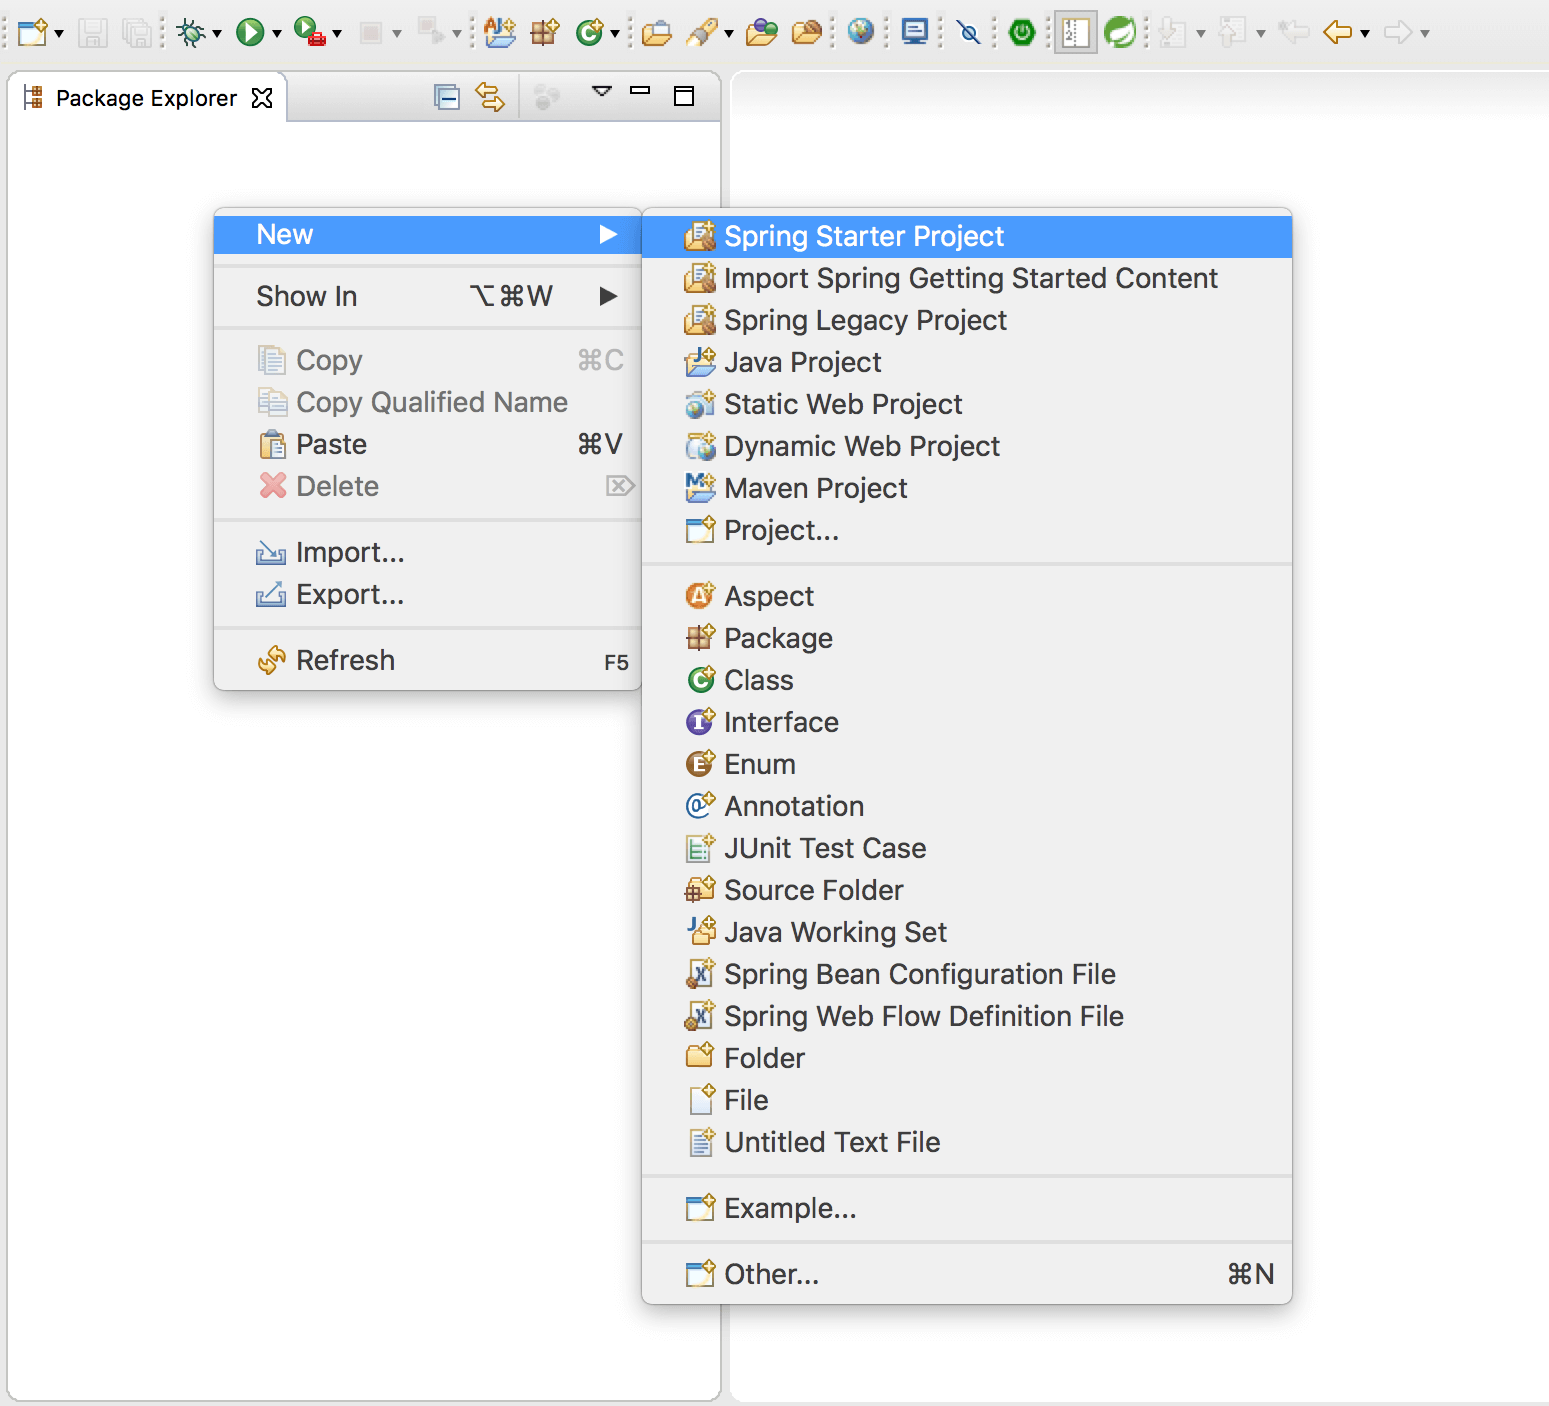
If you're using STS, you can create a starter project by either selecting File > New > Spring Starter Project from the main menu or right-click on the Package Explorer and choose New > Spring Starter Project.
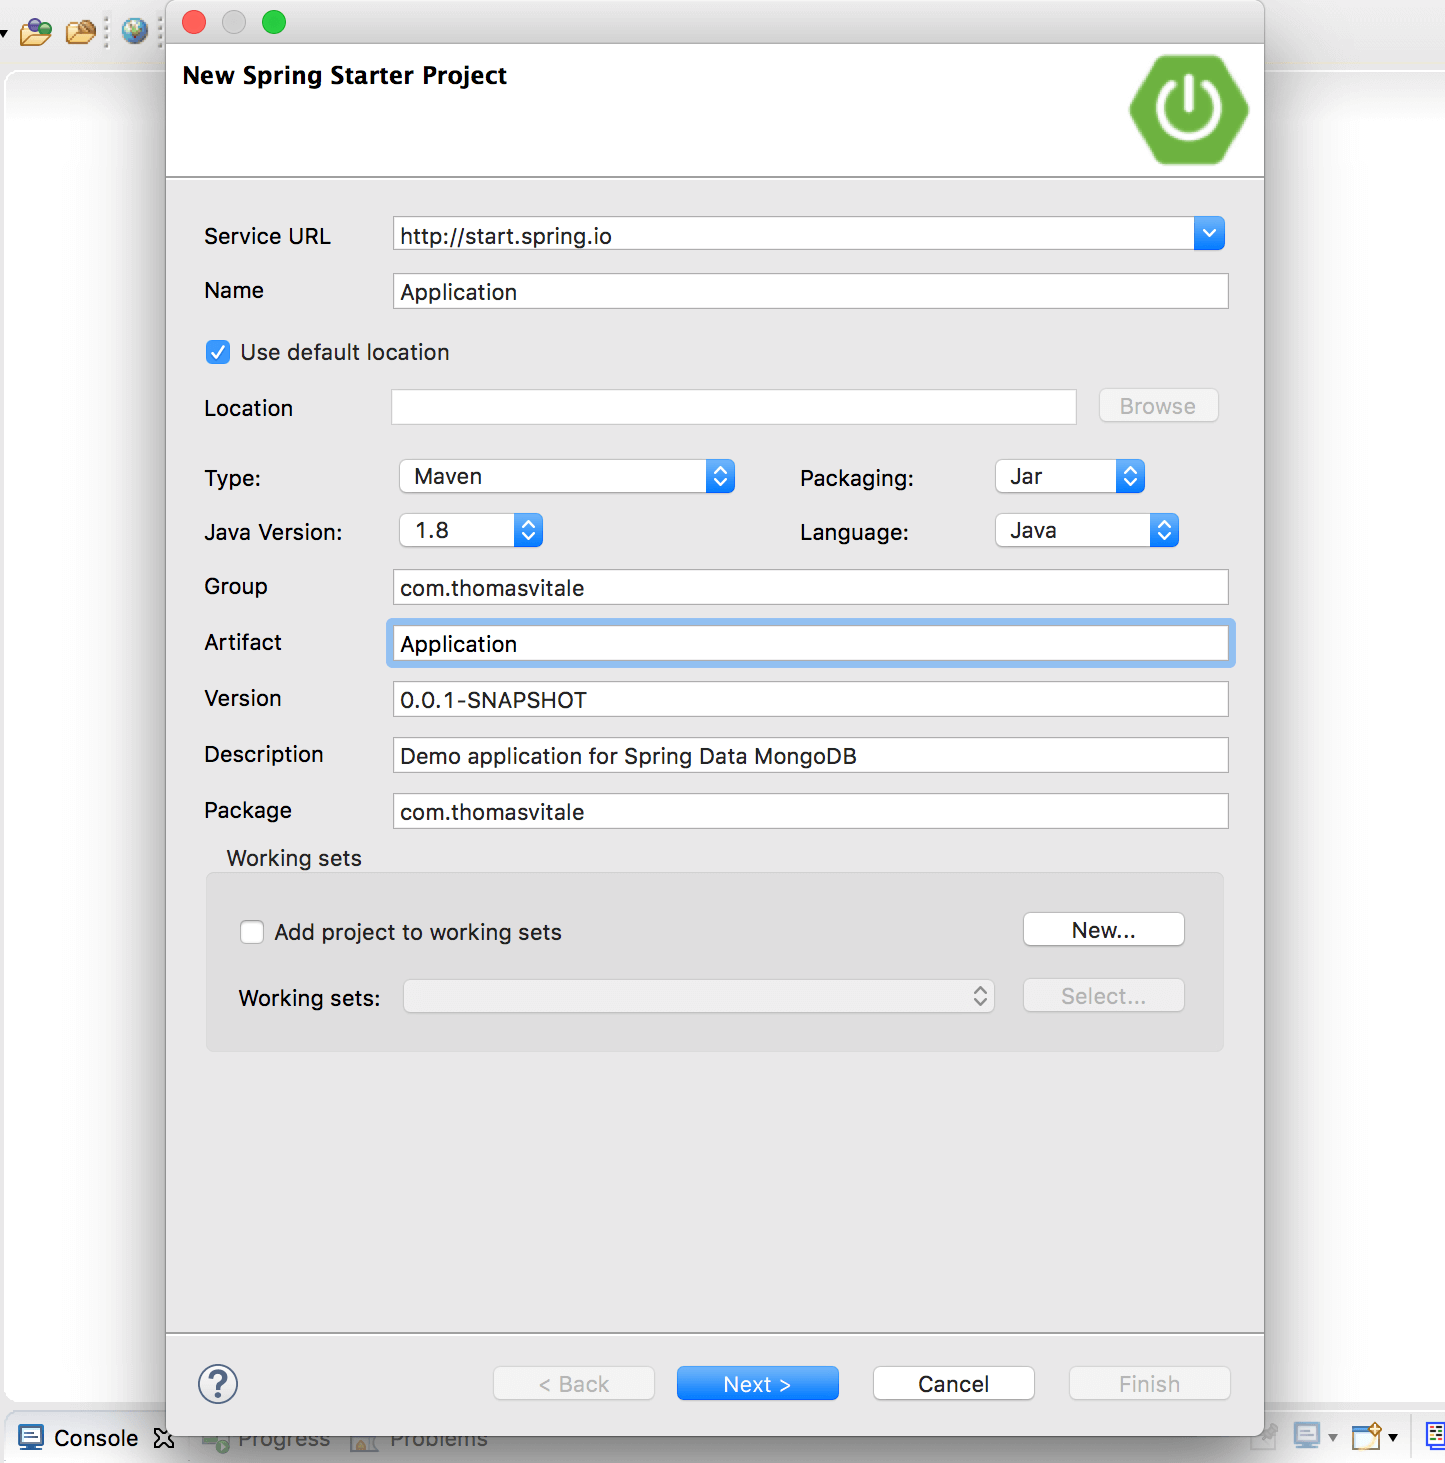
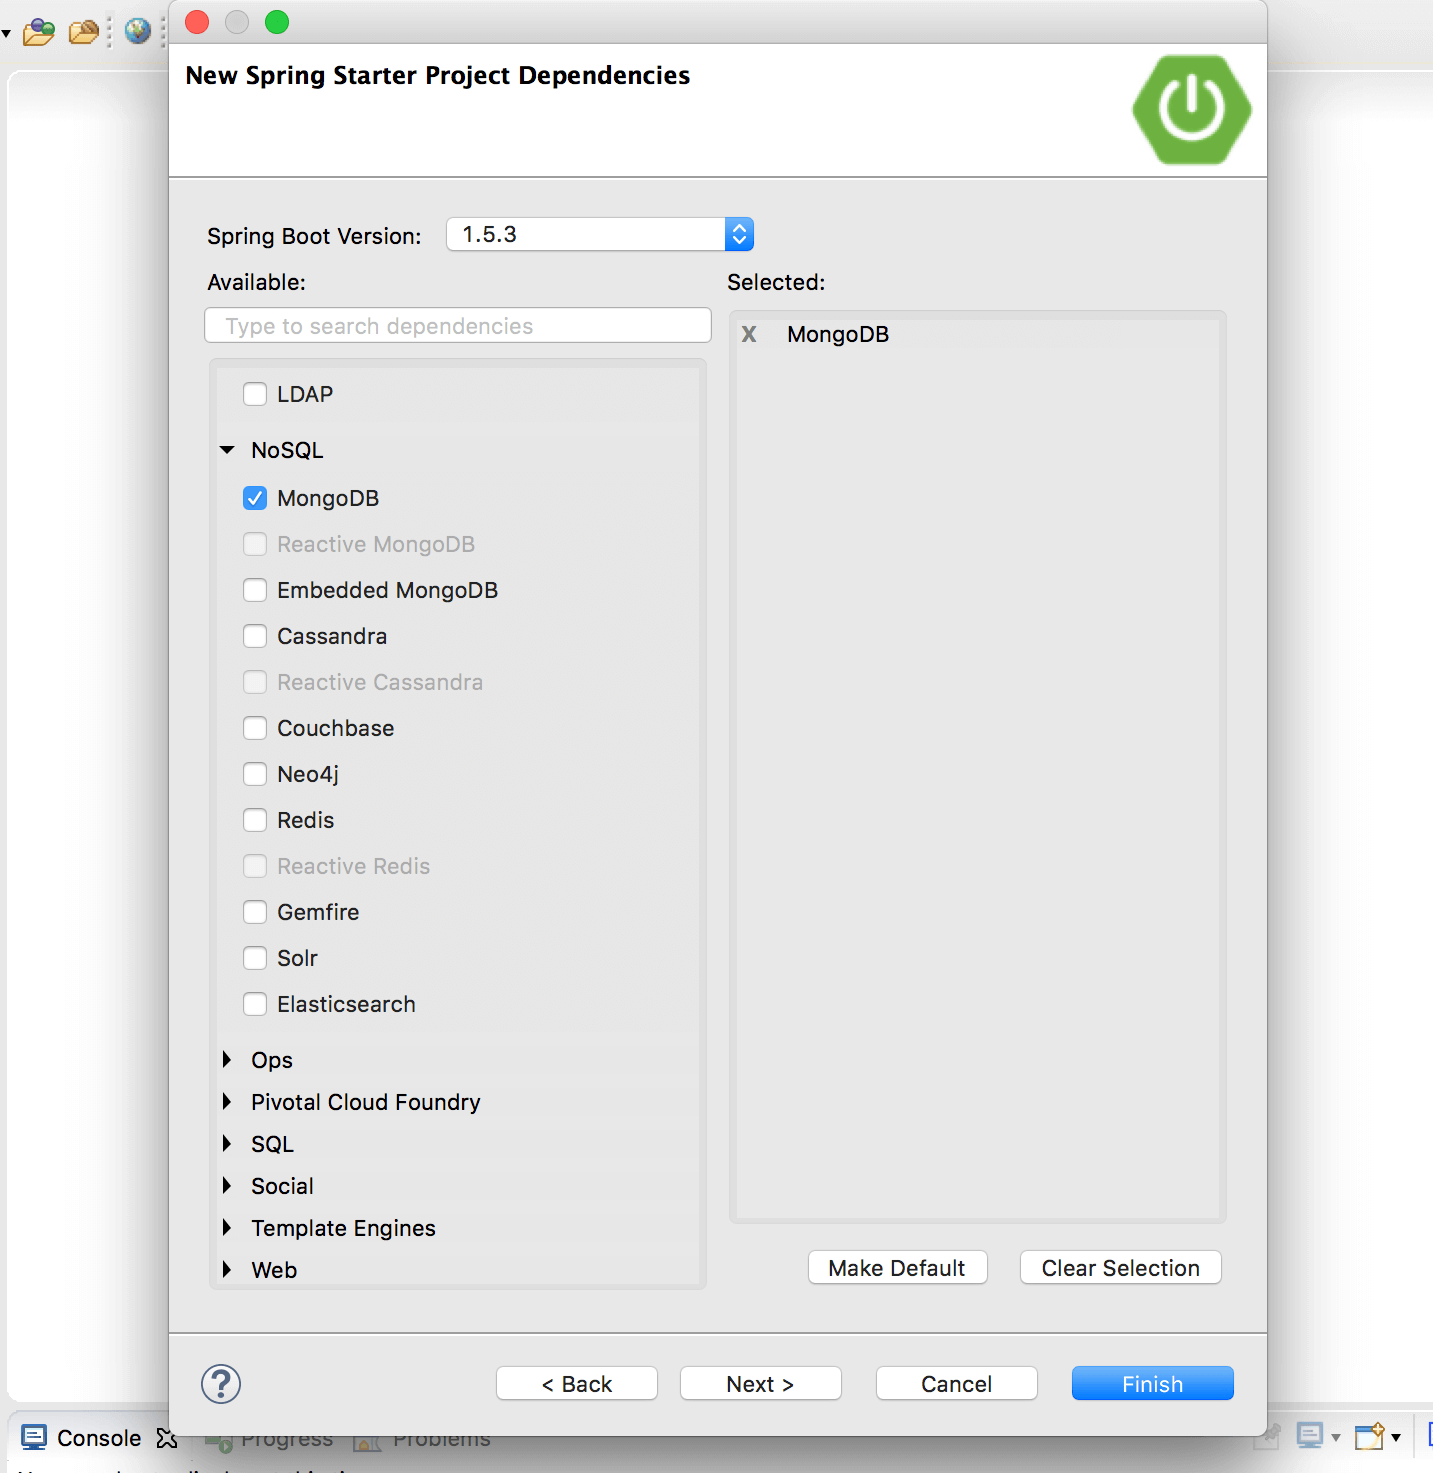
In case you're using another IDE like Eclipse, Netbeans or IntelliJ IDEA, you can create a new Maven project and add to the pom.xml file the dependencies listed in the next paragraph.
3. Maven Dependencies
spring-boot-starter-data-mongodb is the primary dependency of our project.
<?xml version="1.0" encoding="UTF-8"?>
<project xmlns="http://maven.apache.org/POM/4.0.0" xmlns:xsi="http://www.w3.org/2001/XMLSchema-instance"
  xsi:schemaLocation="http://maven.apache.org/POM/4.0.0 http://maven.apache.org/xsd/maven-4.0.0.xsd">
  <modelVersion>4.0.0</modelVersion>

  <groupId>com.thomasvitale</groupId>
  <artifactId>Application</artifactId>
  <version>0.0.1-SNAPSHOT</version>
  <packaging>jar</packaging>

  <name>Application</name>
  <description>Demo application for Spring Data MongoDB</description>

  <parent>
    <groupId>org.springframework.boot</groupId>
    <artifactId>spring-boot-starter-parent</artifactId>
    <version>1.5.3.RELEASE</version>
    <relativePath/> <!-- lookup parent from repository -->
  </parent>

  <properties>
    <project.build.sourceEncoding>UTF-8</project.build.sourceEncoding>
    <project.reporting.outputEncoding>UTF-8</project.reporting.outputEncoding>
    <java.version>1.8</java.version>
  </properties>

  <dependencies>

    <dependency>
      <groupId>org.springframework.boot</groupId>
      <artifactId>spring-boot-starter-data-mongodb</artifactId>
    </dependency>

    <dependency>
      <groupId>org.springframework.boot</groupId>
      <artifactId>spring-boot-starter-test</artifactId>
      <scope>test</scope>
    </dependency>

  </dependencies>

  <build>
    <plugins>
      <plugin>
        <groupId>org.springframework.boot</groupId>
        <artifactId>spring-boot-maven-plugin</artifactId>
      </plugin>
    </plugins>
  </build>

</project>
4. Spring Configuration using Java Annotations
Spring lets you use either Java configuration or XML configuration or a mix of the two. I'll use a pure Java configuration
@Configuration
@EnableMongoRepositories(basePackages = "com.thomasvitale.repository")
@PropertySource("classpath:mongo.properties")
public class MongoConfig extends AbstractMongoConfiguration {

  @Autowired
  private Environment env;

  @Override
  protected String getDatabaseName() {
    return env.getProperty("mongo.database");
  }

  @Override
  public Mongo mongo() throws Exception {
    return new MongoClient(env.getProperty("mongo.host"), Integer.parseInt(env.getProperty("mongo.port")));
  }

  @Override
  protected String getMappingBasePackage() {
    return "com.thomasvitale.model";
  }

}
and store MongoDB properties in a dedicated file.
mongo.database=mydb
mongo.host=127.0.0.1
mongo.port=32769
5. Person Model
The following is the Person Model. The @Document(collection = "persons") annotation specifies in which collection to store a Person document.
@Document(collection = "persons")
public class Person {

  @Id
  private String id;

  private String firstName;
  private String lastName;

  public Person() {
  }

  public Person(String firstName, String lastName) {
    this.firstName = firstName;
    this.lastName = lastName;
  }

  public String getId() {
    return id;
  }

  public void setId(String id) {
    this.id = id;
  }

  public String getFirstName() {
    return firstName;
  }

  public void setFirstName(String firstName) {
    this.firstName = firstName;
  }

  public String getLastName() {
    return lastName;
  }

  public void setLastName(String lastName) {
    this.lastName = lastName;
  }

  @Override
  public String toString() {
    return firstName + " " + lastName;
  }

}
6. Person Repository
By extending MongoRepository, our PersonRepository has a lot of available operations, including the standard CRUD operations. You can also add custom operations like findByFirstName and findByLastName without writing any implementation: Spring Data MongoDB creates them for you!
public interface PersonRepository extends MongoRepository<Person, String> {

  public Person findByFirstName(String firstName);
  public List<Person> findByLastName(String lastName);

}
7. Demo
Since we have Spring Data MongoDB configured, a model and a repository, it's time to test the application by performing some CRUD and custom operations.
@SpringBootApplication
public class Application implements CommandLineRunner {

  @Autowired
  PersonRepository personRepository;

  public static void main(String[] args) {
    SpringApplication.run(Application.class, args);
  }

  @Override
  public void run(String... arg0) throws Exception {

    // Save two Person documents on Mongo
    personRepository.save(new Person("Sheldon", "Cooper"));
    personRepository.save(new Person("Missy", "Cooper"));
    personRepository.save(new Person("Leonard", "Hofstadter"));

    // Get all people
    System.out.println(">>> All people in the database:");
    personRepository.findAll().forEach(System.out::println);

    // Get all people with a specific last name
    System.out.println(">>> All people with last name = 'Cooper'");
    personRepository.findByLastName("Cooper").forEach(System.out::println);

    // Update an individual person
    Person person = personRepository.findByFirstName("Sheldon");
    person.setFirstName("Shelly");
    personRepository.save(person);

    // Delete all
    personRepository.deleteAll();
  }
}
Resources
- Spring Boot
- Building an Application with Spring Boot
- Spring Data MongoDB Project
- Accessing Data with MongoDB
- Spring Data MongoDB - Reference Documentation
If you're interested in cloud native development with Spring Boot and Kubernetes, check out my book Cloud Native Spring in Action.
