Podman Desktop for Java Development
Install Podman Desktop for managing containers and learn how to use it for Java development (Spring Boot, Quarkus, Testcontainers, Buildpacks).

Podman is a solution to manage containers, pods, and images in a container or Kubernetes environment. It complies with OCI standards and can be used as an alternative to Docker.
Podman Desktop is a convenient GUI on top of Podman to simplify container management across different operating systems and runtimes, and with native support for Kubernetes and GPU-based AI workloads.
Both Podman and Podman Desktop are fully open-source and free to use. They are part of a broader set of container tools originally developed by Red Hat, backed by an active community, and hosted at the Cloud Native Computing Foundation as CNCF Sandbox projects.
This article will show how to install Podman Desktop, and how to configure it to make it ready for Java development.
Installing Podman Desktop
Let's start by installing Podman Desktop. On macOS and Linux, you can use the Homebrew package manager.
brew install podman-desktop
On Windows, you can use the Winget package manager.
winget install -e --id RedHat.Podman-Desktop
If you have Docker Desktop running, ensure you stop it before moving on.
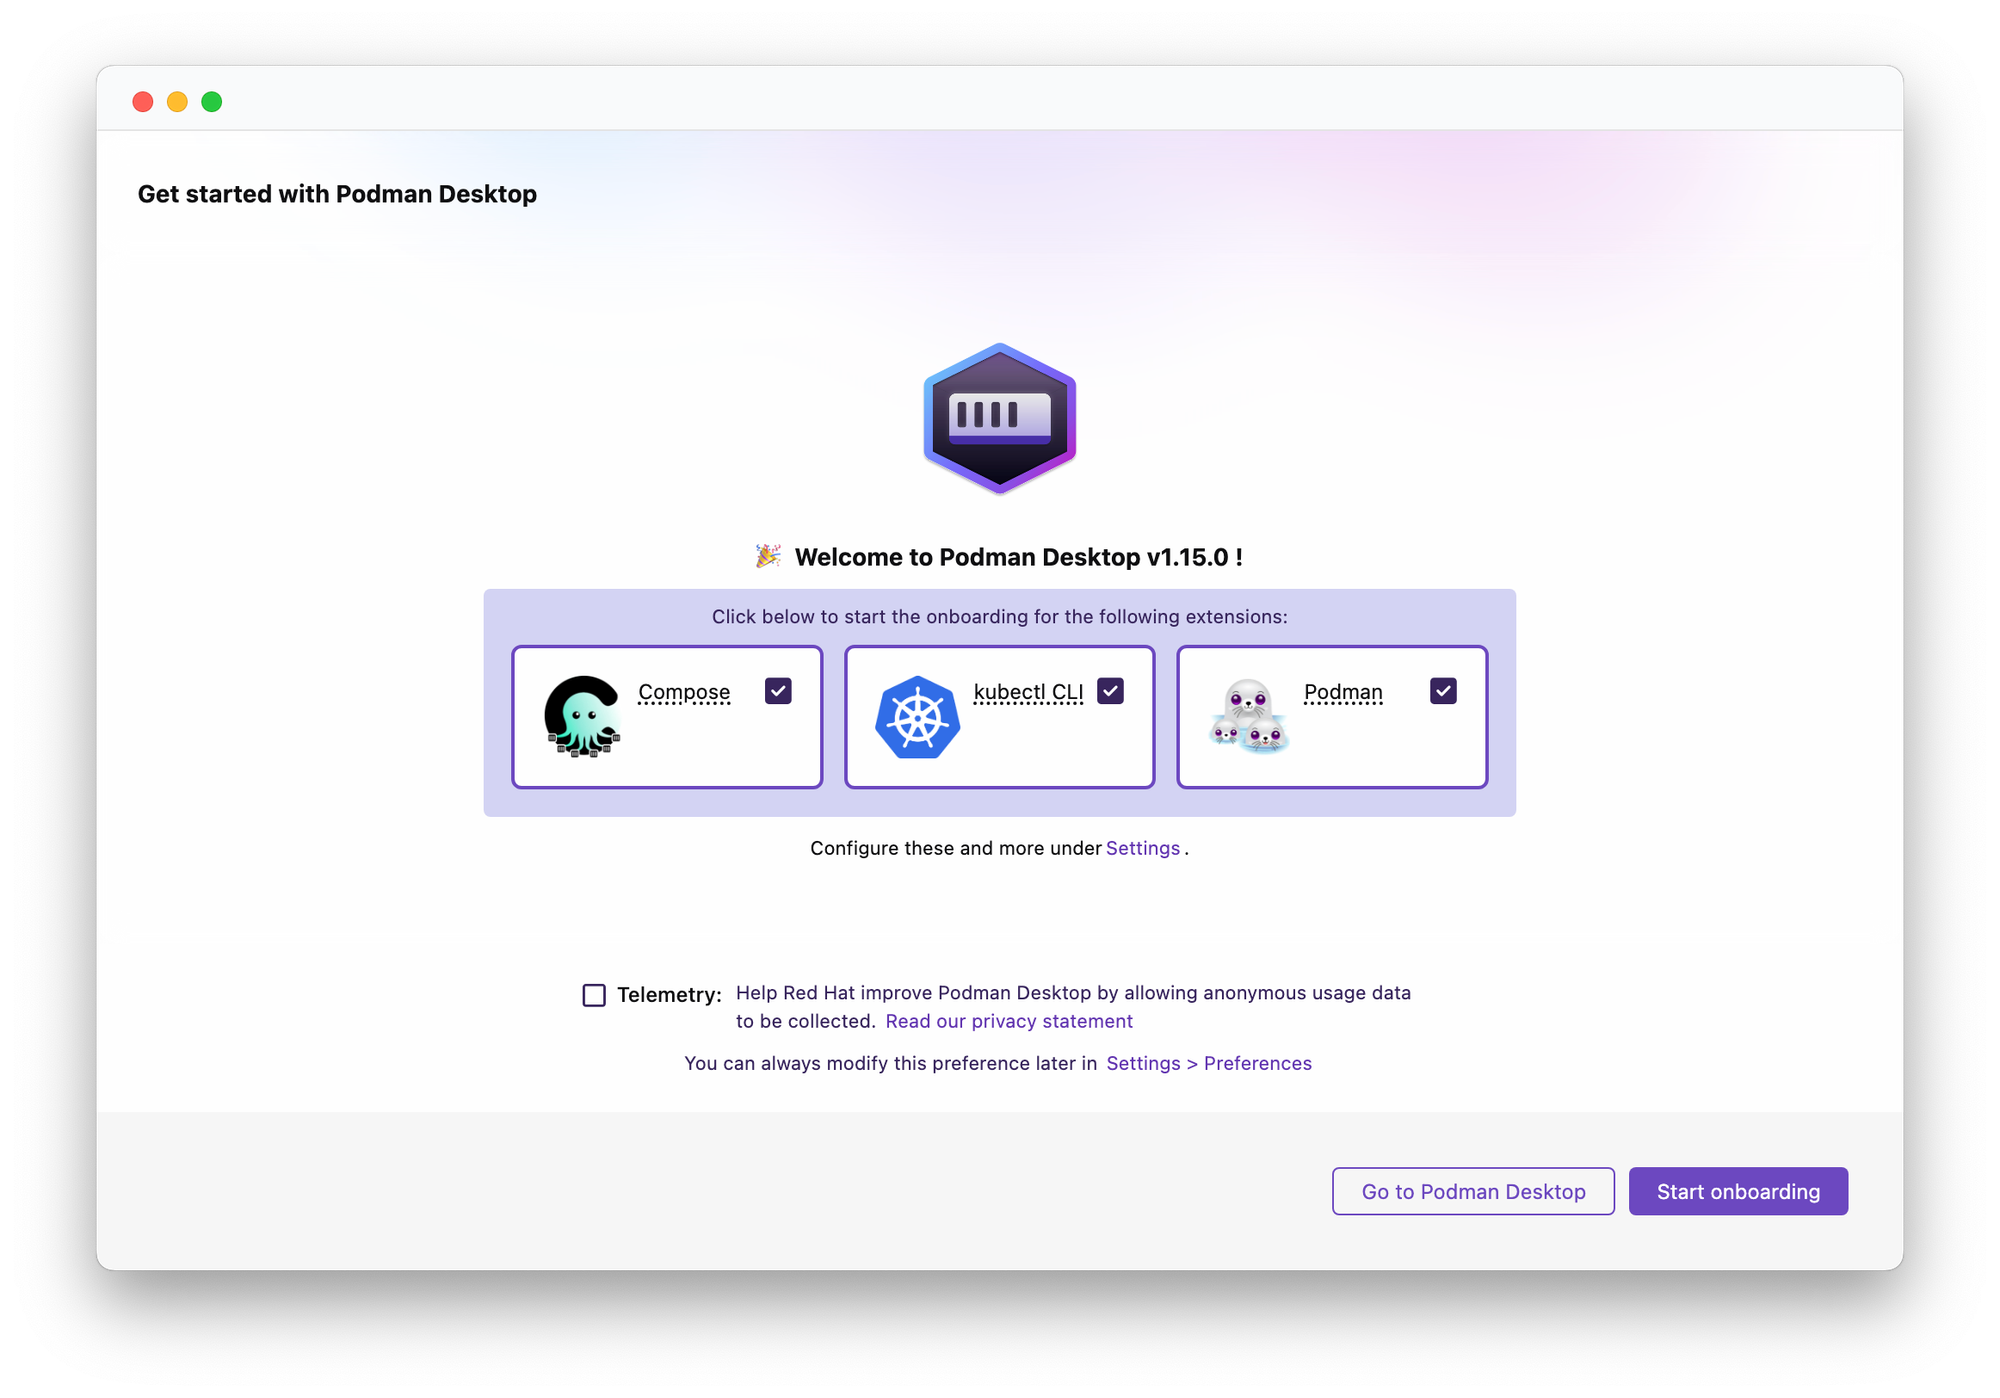
After the installation is complete, open Podman Desktop. The first time you open it, the onboarding procedure will guide you through the initial setup. By default, the onboarding will include the extensions supporting Compose, Kubernetes, and Podman. You can also opt out of sharing usage data with Red Hat. When you're ready, click the "Start onboarding" button and follow the instructions.
At the end of the onboarding process, you'll be asked to initialize a new Podman Machine, which will start a lightweight virtual machine with Linux and the Podman Engine installed. That's where all your containers, Pods, and AI workloads will run.
podman machine subcommands to create and manage Podman Machines. Podman Desktop is not required, but it simplifies and automates the process.Leave the default name for the Podman Machine and configure CPU, memory, and disk space based on your needs.
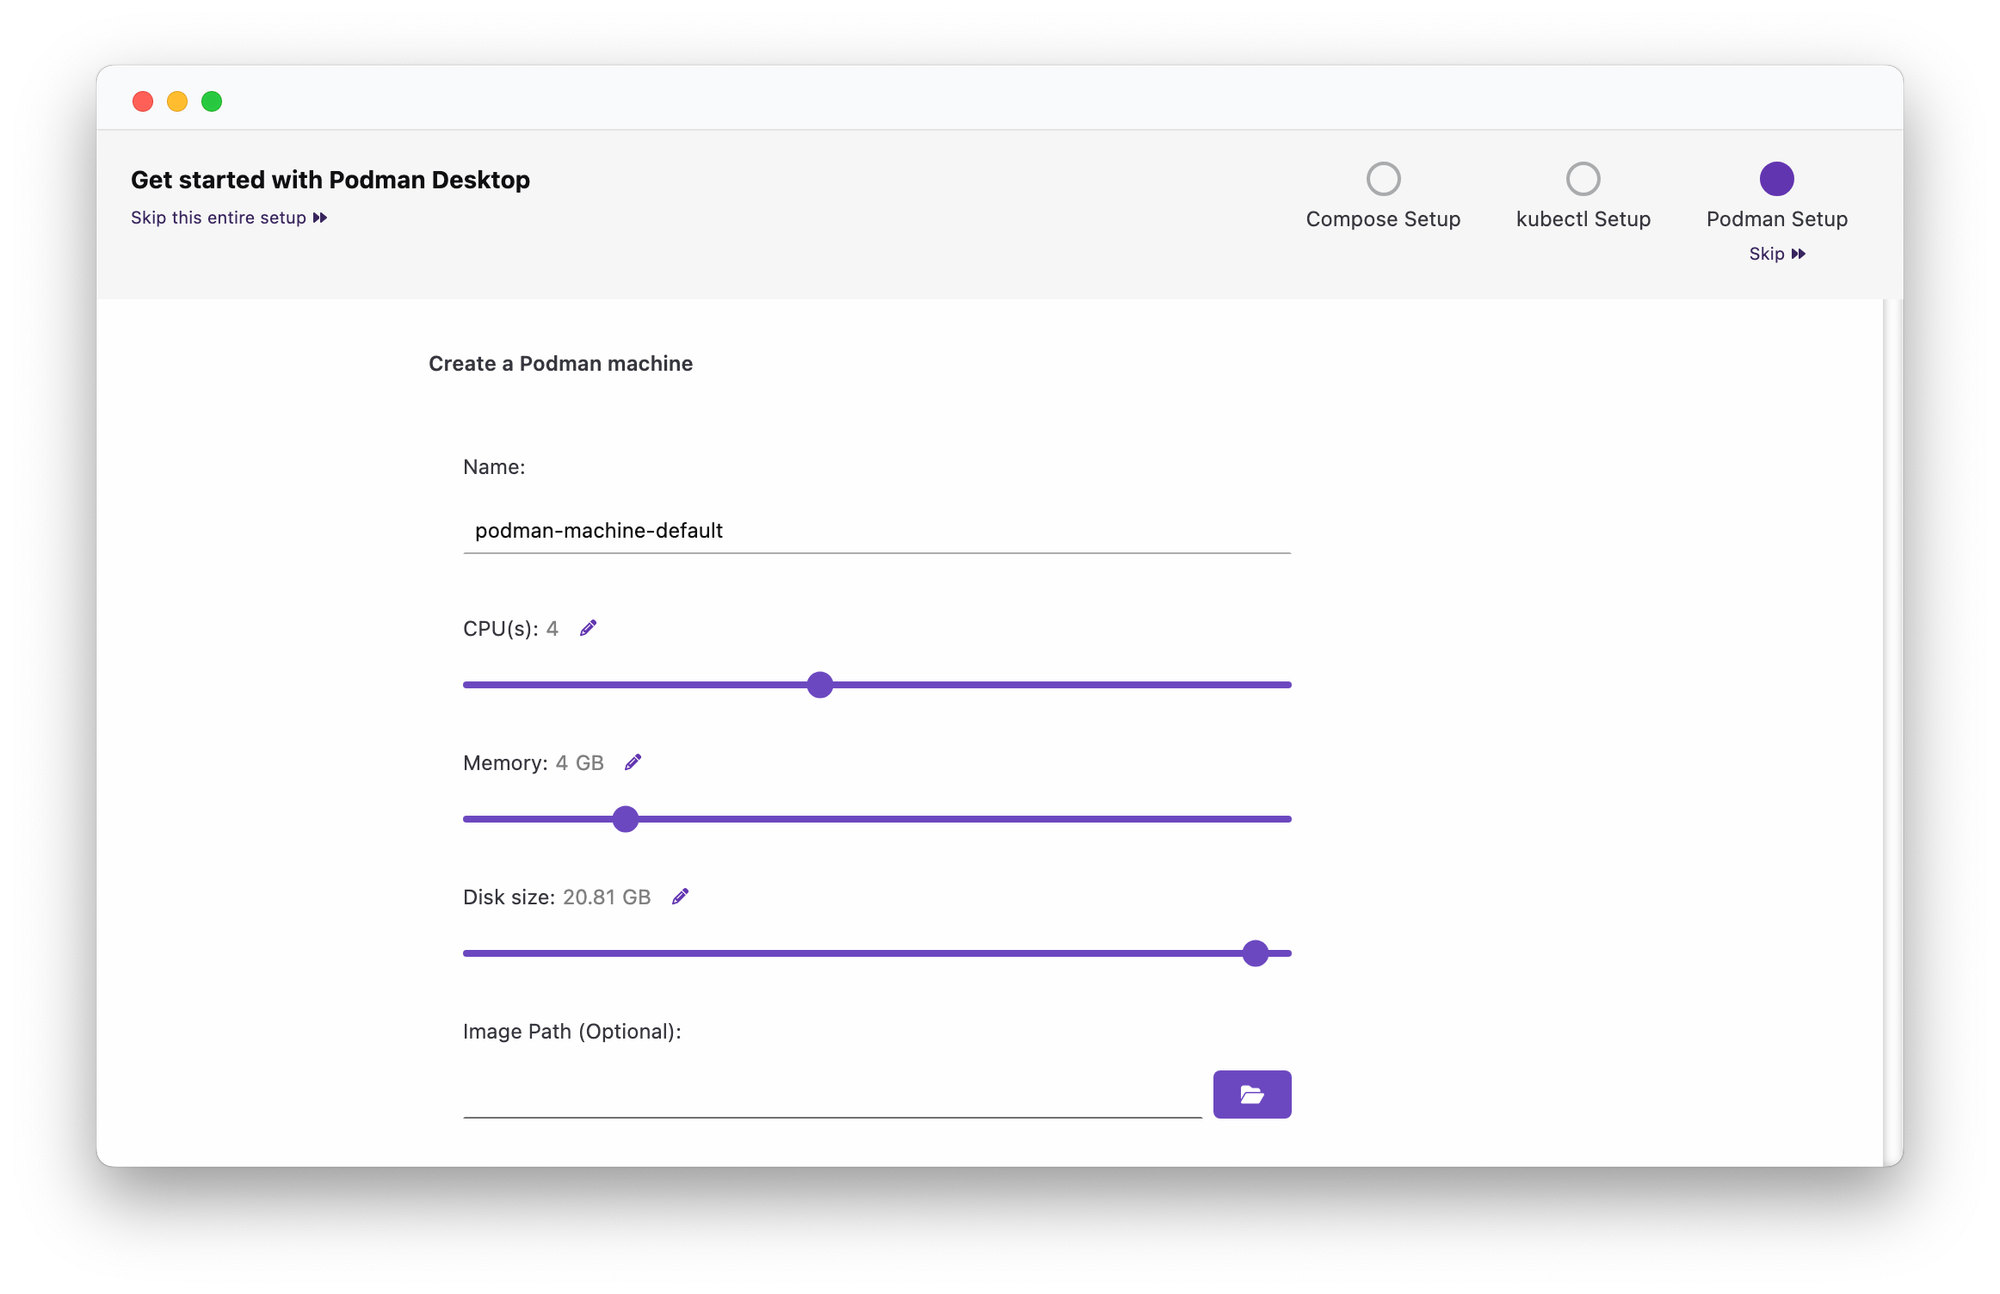
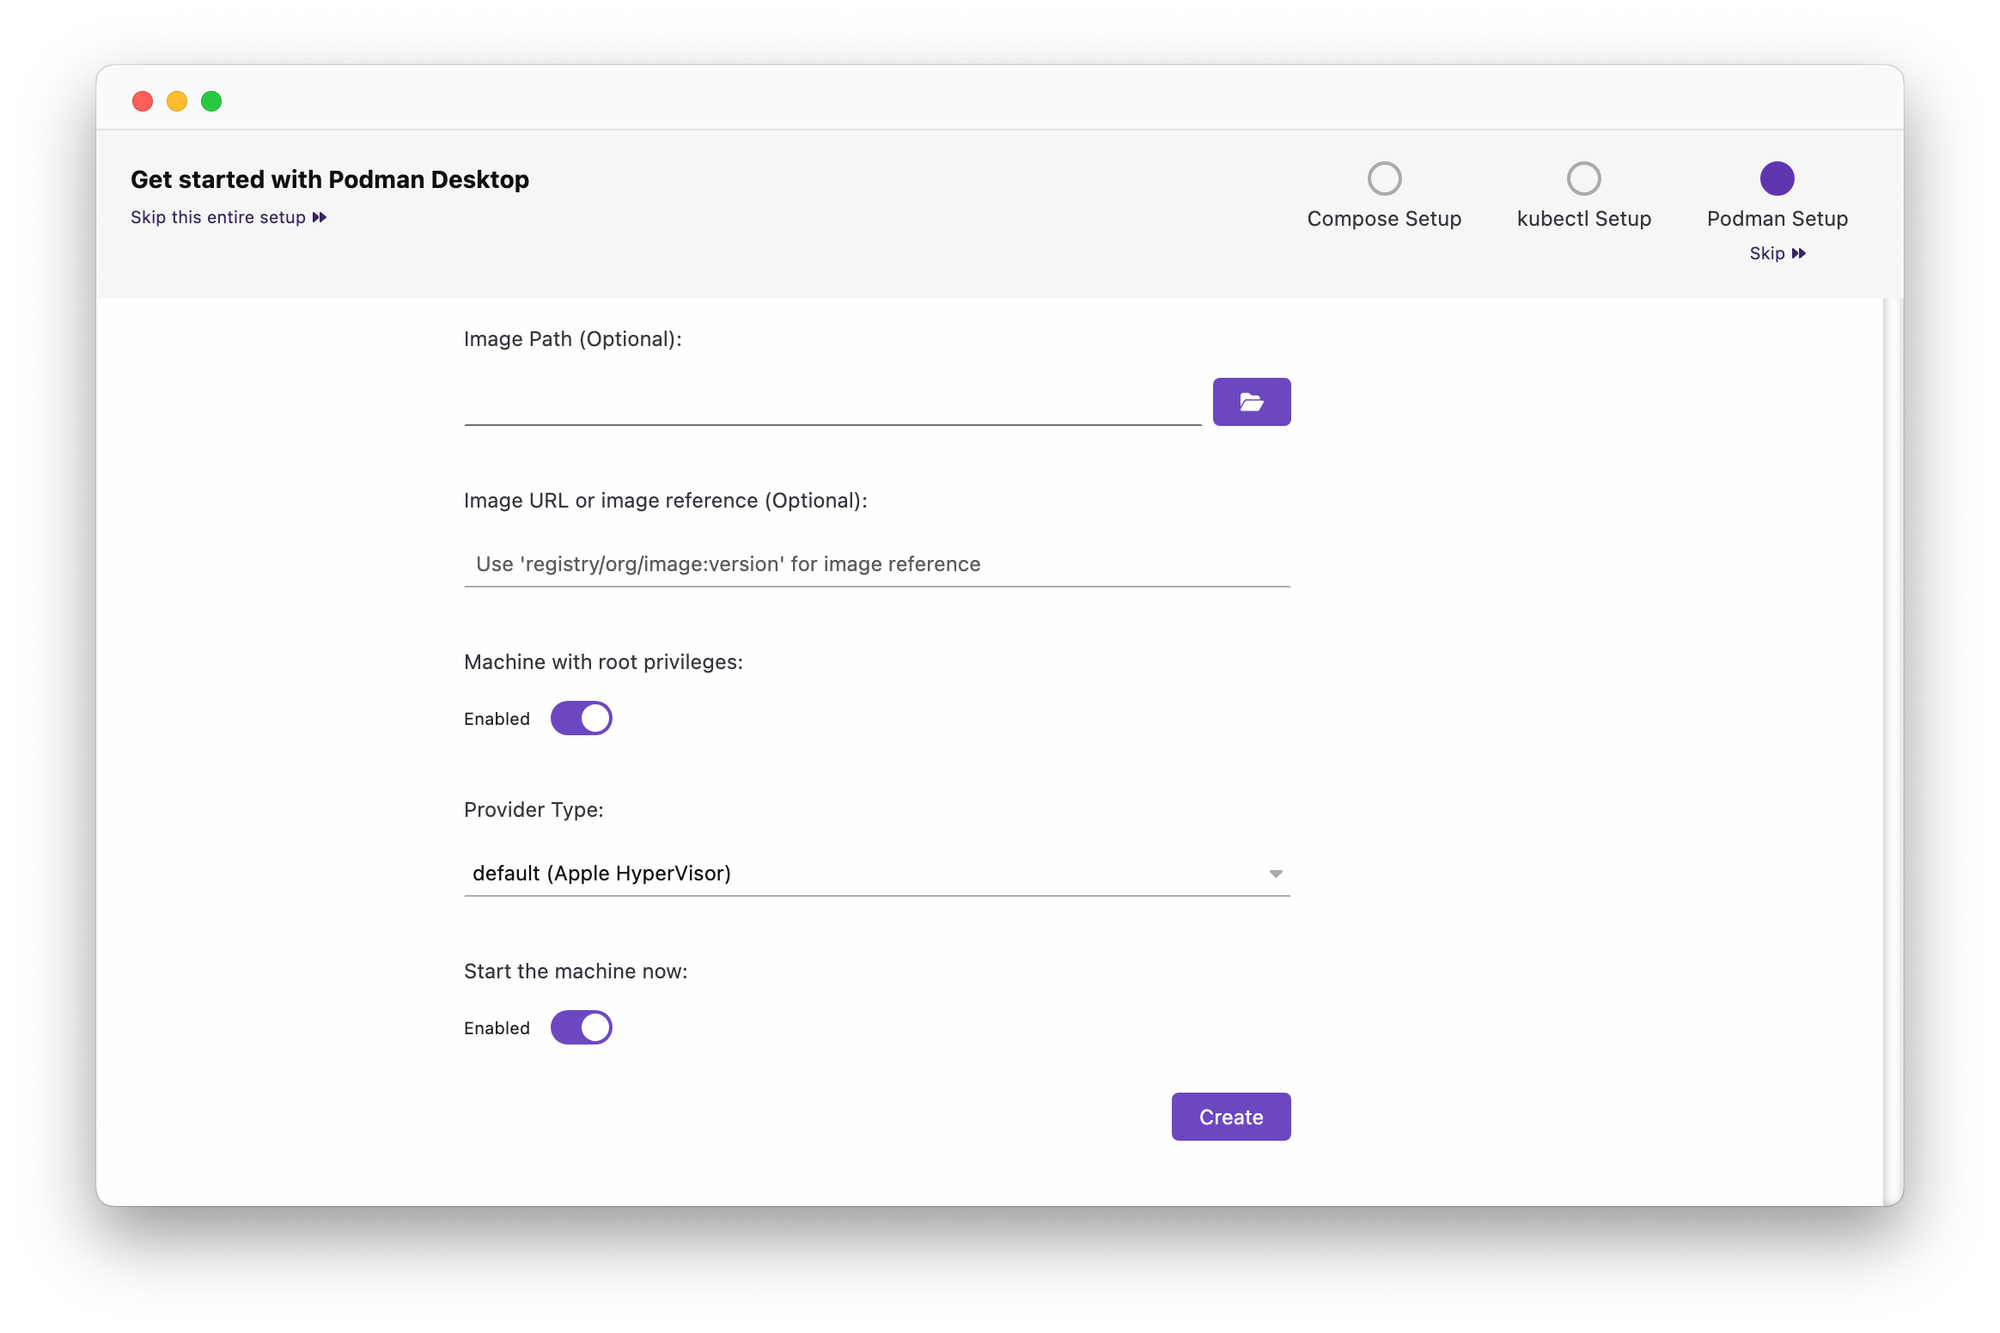
A Podman Machine can be configured to run either in rootless or rootful mode. To ensure Docker compatibility, make sure the option "Machine with root privileges" is enabled. You can also choose the "Provider Type". The default will be enough to follow along with this article. When you're done configuring the Podman Machine, click the "Create" button.
Next time you start Podman Desktop, the Podman Machine you have configured will be automatically started. That's one of the advantages of using Podman Desktop.
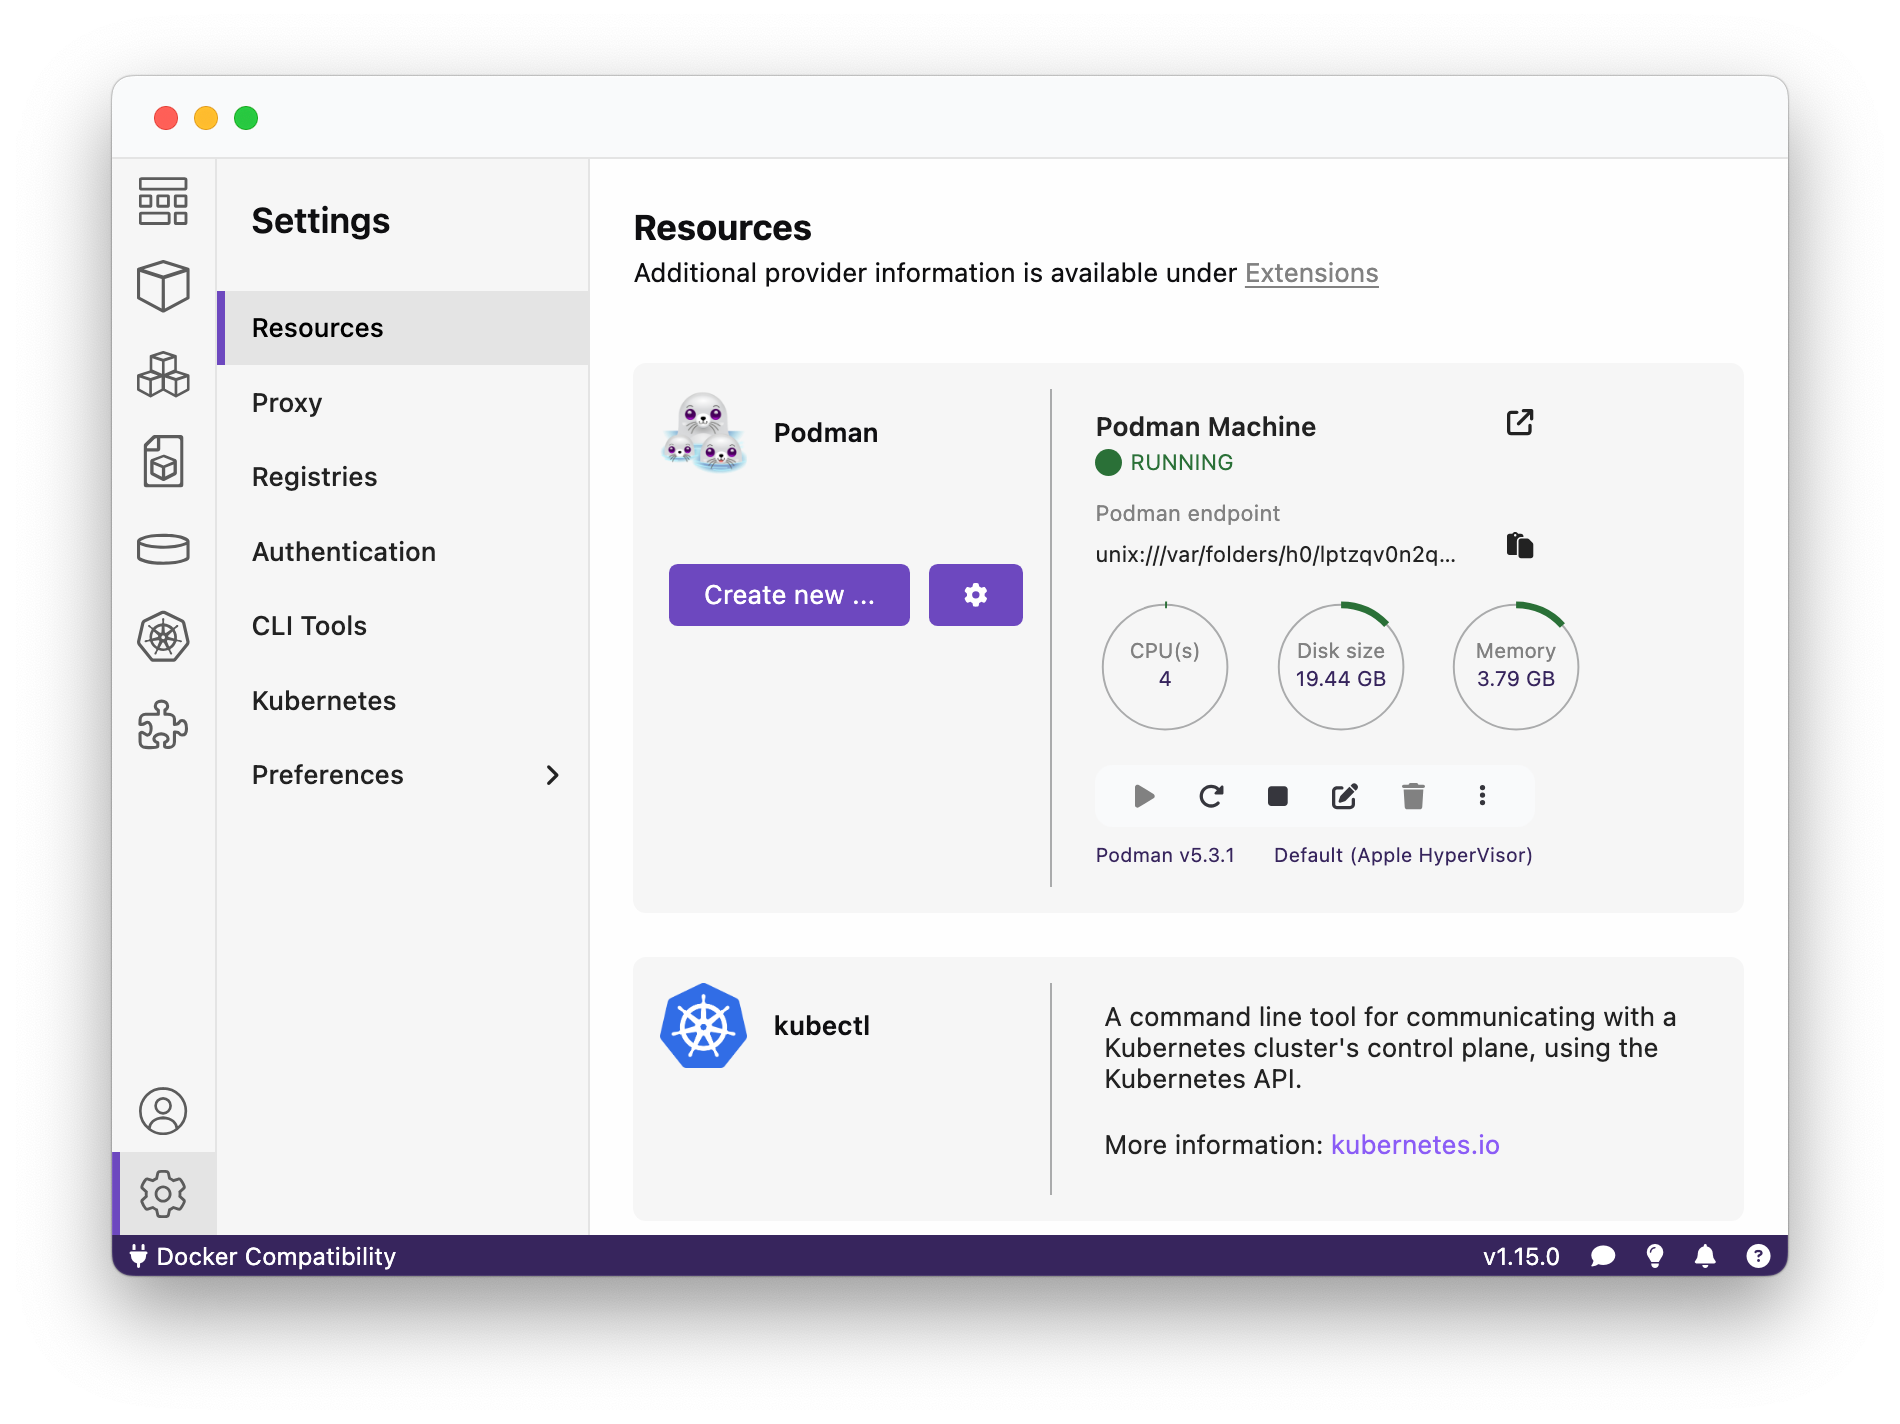
You can manage your Podman Machines at any time by going to Settings > Resources.
Let's now verify that Podman is working correctly by running a container. We'll use the hello image from the Podman project.
podman run --name demo-podman hello
The result should be the following message printed on the console.
!... Hello Podman World ...!
.--"--.
/ - - \
/ (O) (O) \
~~~| -=(,Y,)=- |
.---. /` \ |~~
~/ o o \~~~~.----. ~~
| =(X)= |~ / (O (O) \
~~~~~~~ ~| =(Y_)=- |
~~~~ ~~~| U |~~
Project: https://github.com/containers/podman
Website: https://podman.io
Desktop: https://podman-desktop.io
Documents: https://docs.podman.io
YouTube: https://youtube.com/@Podman
Bluesky: @podmanio.bsky.social
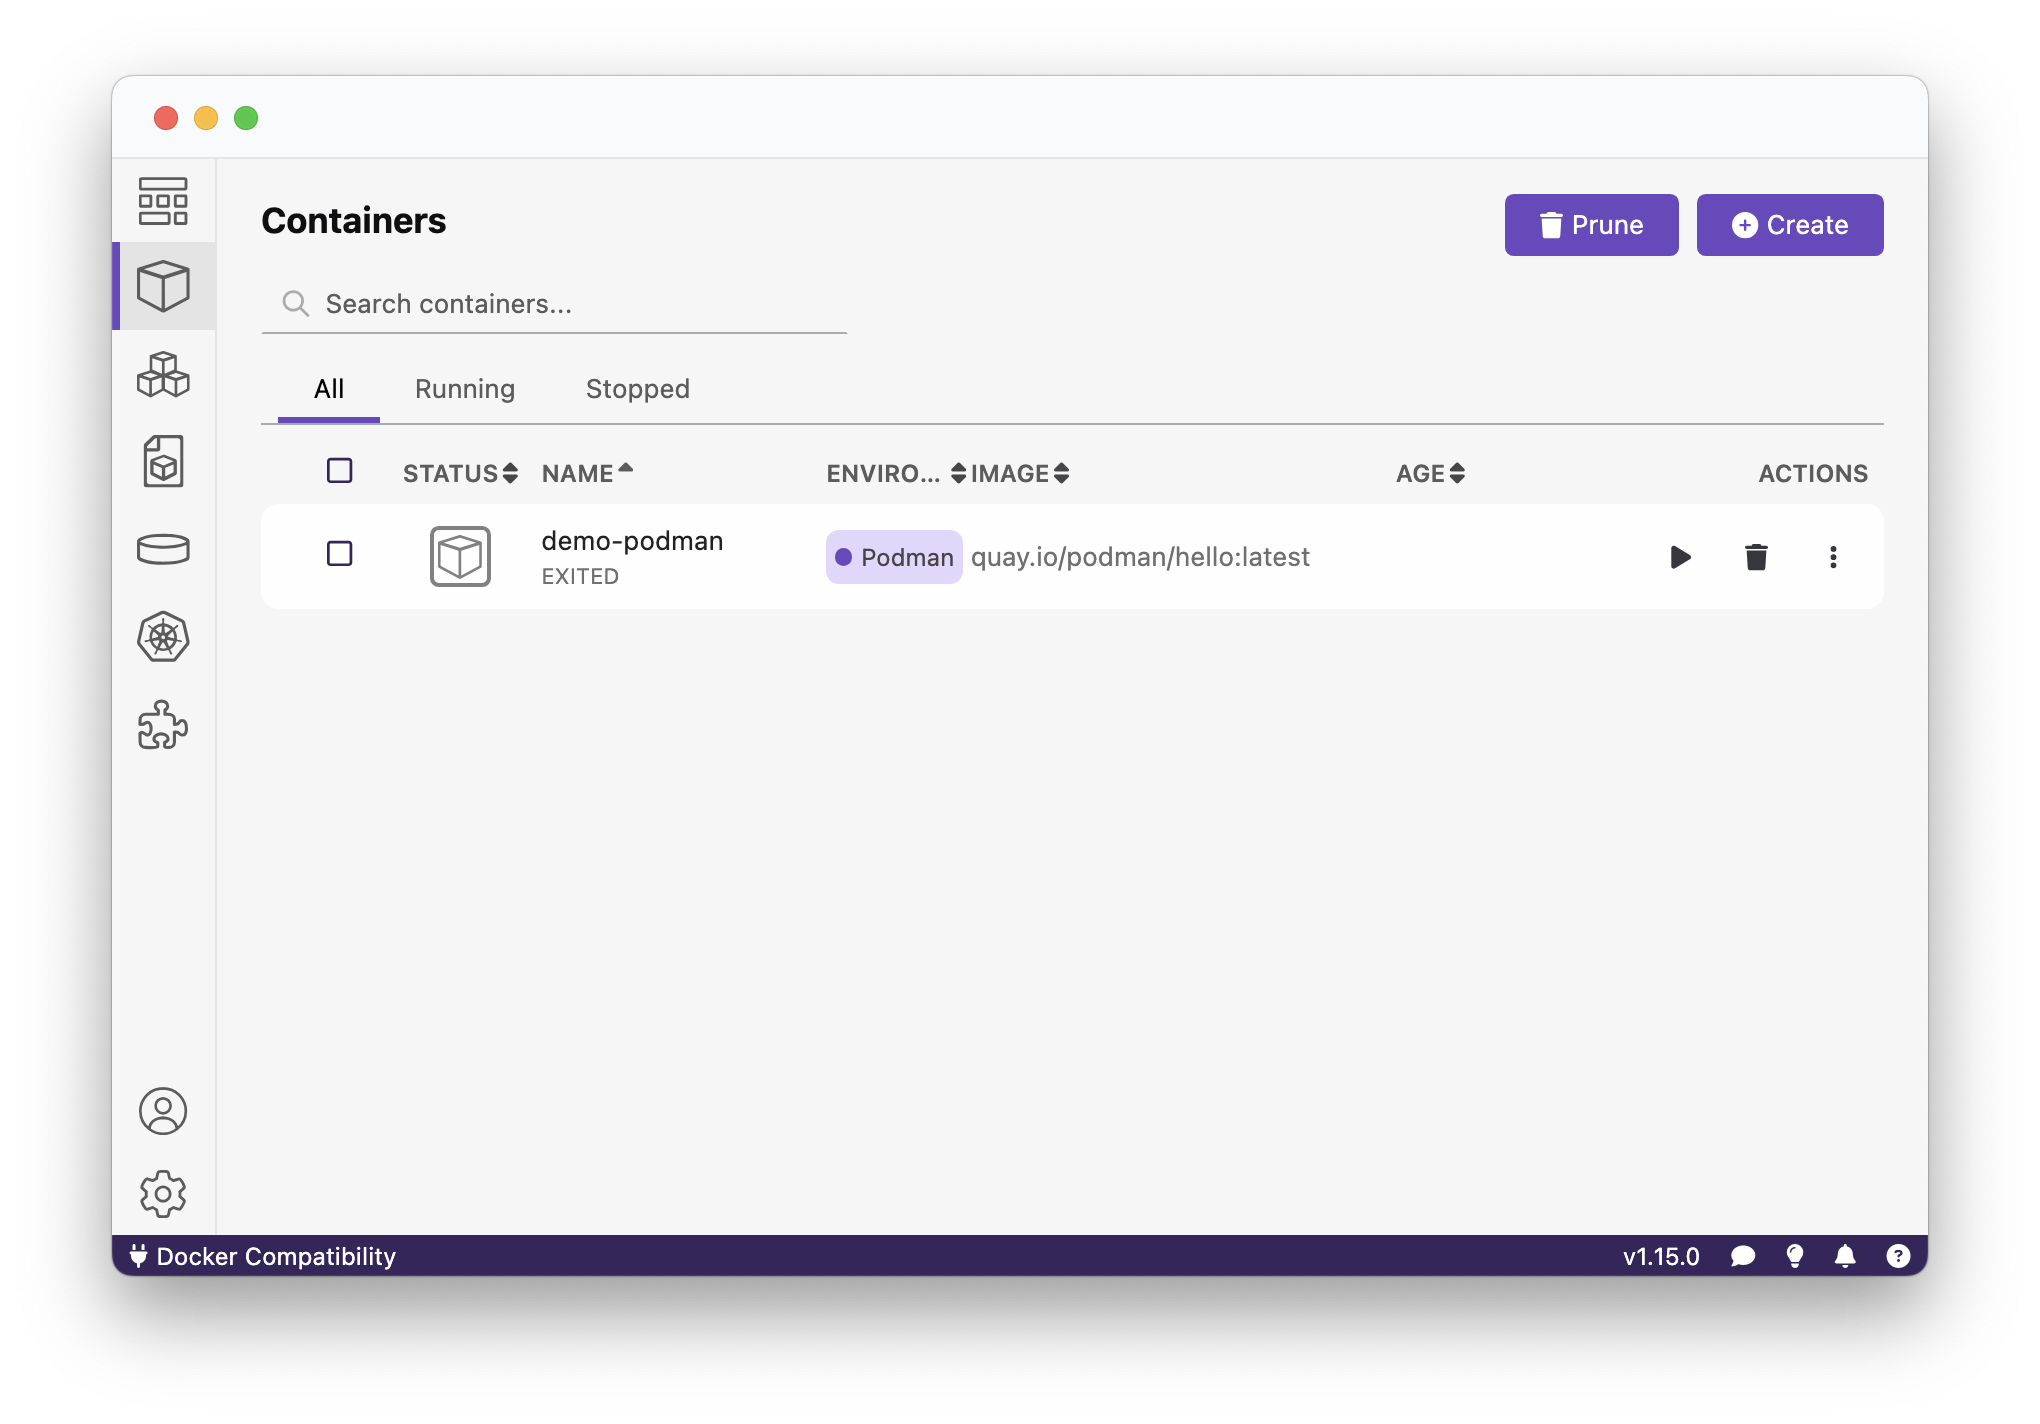
Mastodon: @Podman_io@fosstodon.org```You can get more information about the container from Podman Desktop by selecting the Containers tab.
Next, let's verify we can run containers from a file adhering to the Compose Specification (like a Docker Compose file). We'll use the same hello image from before. First, create an empty folder and define a compose.yml file inside it.
services:
  hello:
    image: hello
    container_name: demo-compose
From the same folder where the compose.yml file is located, run the following command:
podman compose up
Podman will use the Compose extension configured earlier to run the container defined in the compose.yml file. By default, it will use Docker Compose (installed automatically as part of the onboarding process). You can also switch to a different implementation of the Compose Specification.
podman compose down.Awesome! Podman Desktop is now correctly installed. Next, I'll show you how you can keep using tools that rely on the Docker API and the Docker CLI.
Configuring the Docker Compatibility
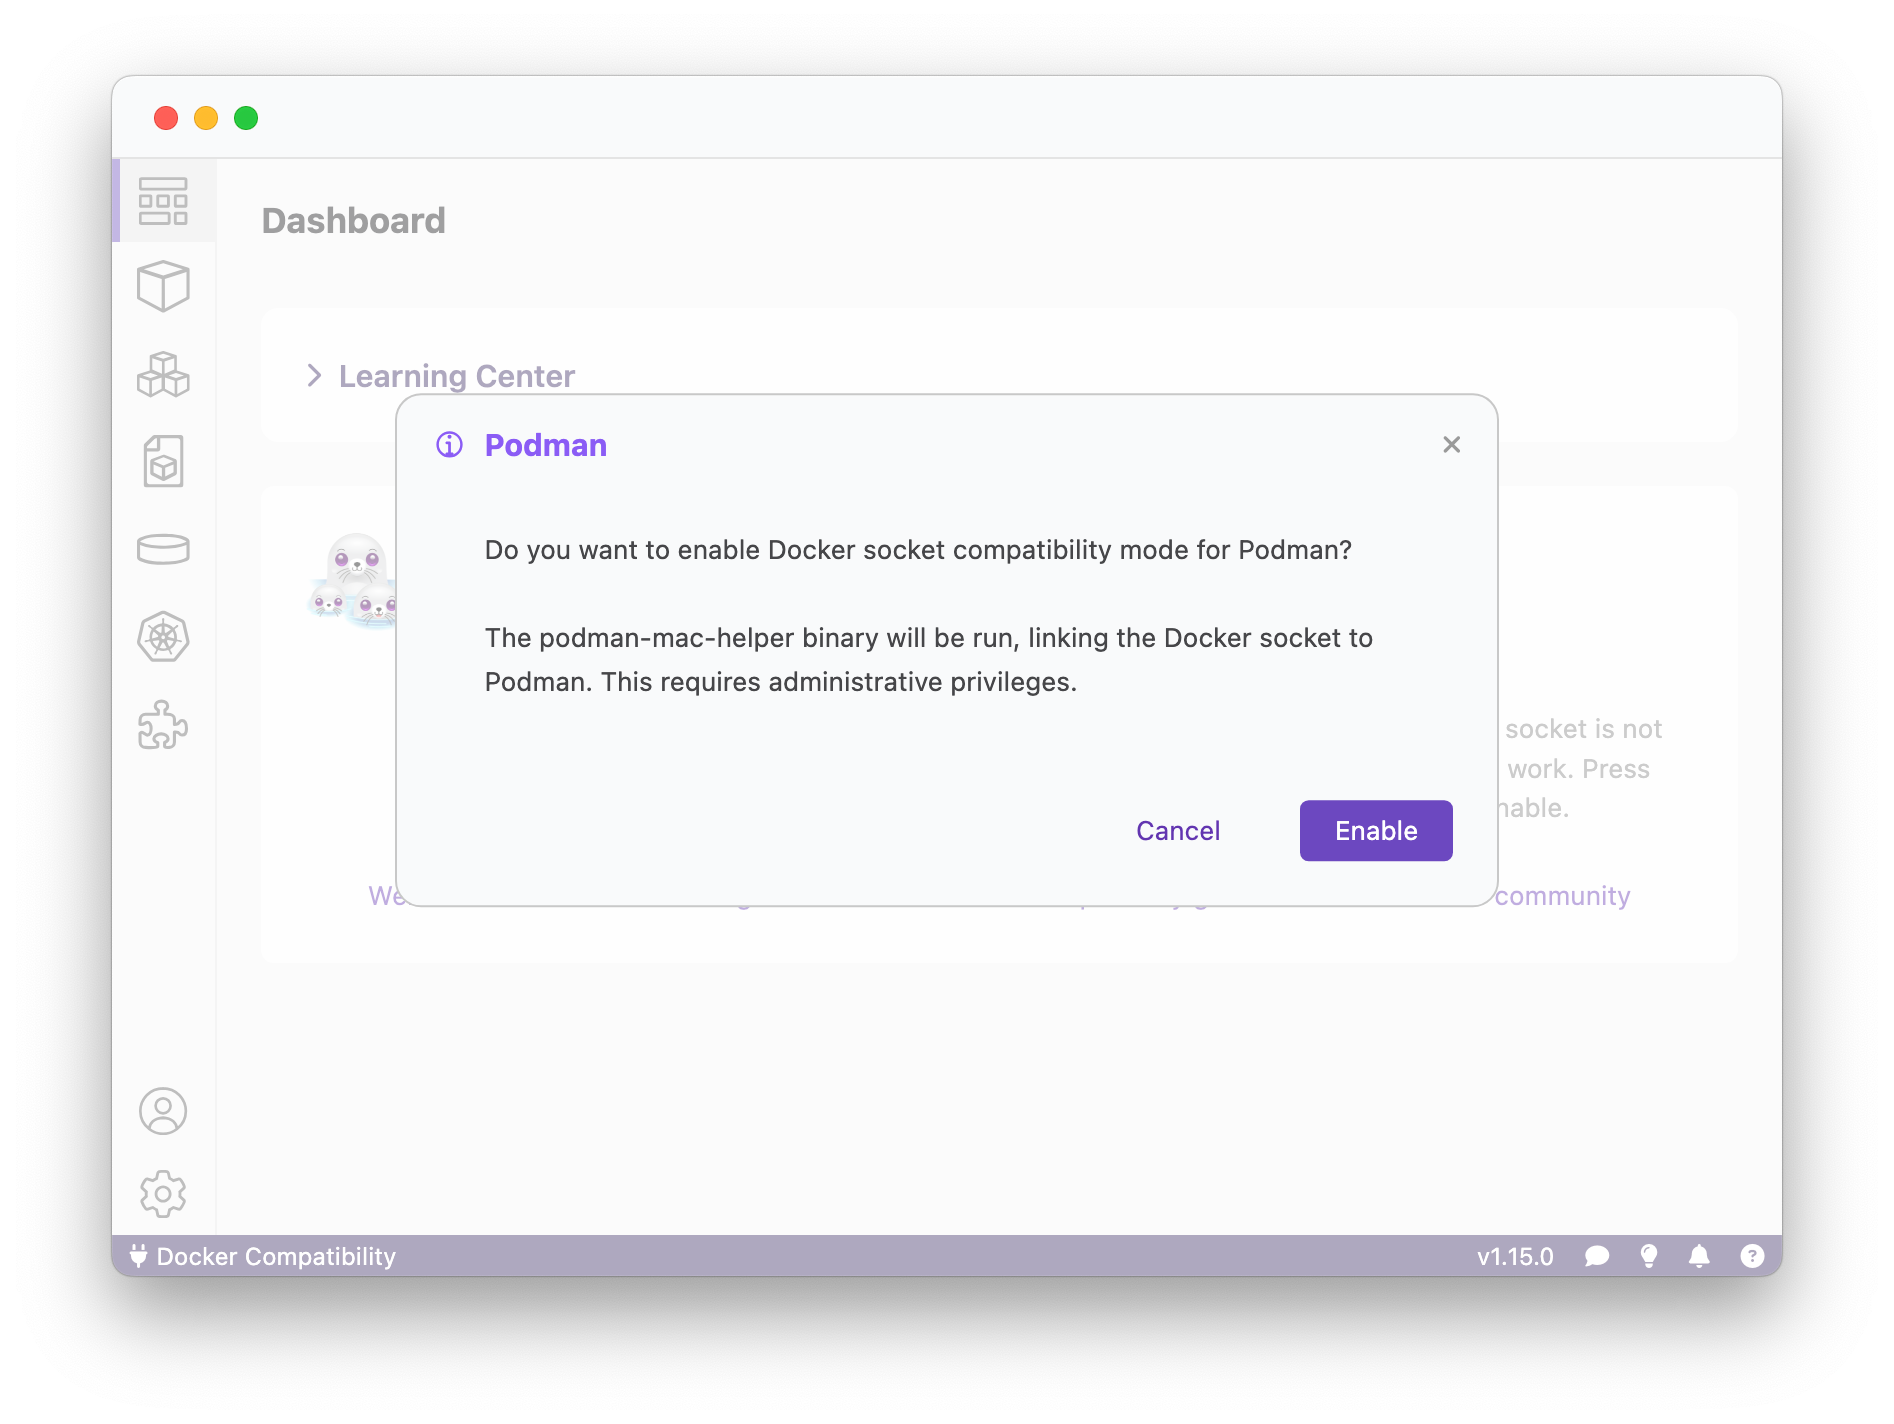
When working with Java, you might be using tools like Cloud Native Buildpacks or Testcontainers that expect a Docker socket to be available. Podman Desktop provides a convenient feature to expose a Docker-compatible socket that redirects any Docker command to the Podman Engine.
You can quickly enable this feature by clicking the "Docker Compatibility" label on the bottom-left of the Podman Desktop window.
Let's verify that it works. We'll use Spring Boot as an example.
Spring Boot
First, check out the following Git repository.
git clone https://github.com/ThomasVitale/spring-tutorials.git
cd spring-tutorials/spring-boot-docker-compose
Spring Boot can automatically start and stop containers from a Compose file when running an application in development.
./gradlew bootRun
sdk install java 23-graalce.As you can see from the application logs, Spring Boot uses the compose.yml file included in the repository (spring-boot-docker-compose/compose.yml) to start a PostgreSQL container as part of the application lifecycle. Since we configured the Docker compatibility layer in Podman, the container is run on Podman even though Spring Boot uses the Docker API.
Cloud Native Buildpacks
Let's now try the Cloud Native Buildpacks integration in Spring Boot, which also requires a Docker socket. Stop the previous process (Ctrl-C) and then use the bootBuildImage task to containerize the application.
./gradlew bootBuildImage
The result will be an OCI image called book-service that you can run on any OCI-compliant runtime, including Podman, Docker, and Kubernetes.
Similarly, you can use the Cloud Native Buildpacks integration in Quarkus on top of Podman using the ./gradlew build -Dquarkus.container-image.build=true command.
Testcontainers
Testcontainers is a convenient library to run applications dependencies as lightweight containers, both at development and testing time. Let's give it a try on Podman with another Spring Boot example.
git clone https://github.com/ThomasVitale/spring-tutorials.git
cd spring-tutorials/spring-boot-testcontainers
The application relies on a PostgreSQL database and uses Testcontainers to run integration tests against an actual database instance as a container.
./gradlew test
In Spring Boot, Testcontainers can also be used to launch a PostgreSQL container when running the application at development time. Let's verify that works, too.
./gradlew bootTestRun
As you can see from the application logs, Spring Boot uses the Testcontainers configuration (TestBookServiceApplication.java) to start a container as part of the application lifecycle. Since we configured the Docker compatibility layer in Podman, the container is run on Podman even though Testcontainers uses the Docker API.
Similarly, the Testcontainers integration in Quarkus can now work on Podman, including for running tests and dev services.
Docker CLI
The Podman CLI offers most of the commands you can find in the Docker CLI, including the ones to manage Compose files. Still, if you'd like to use the Docker CLI to interact with Podman, you can do so when enabling the Docker compatibility feature in Podman Desktop.
brew install docker.Let's try that out by running the same container image as before, but this time using the Docker CLI.
docker run --name demo-docker hello
Even if using the Docker CLI, the container ran on Podman.
podman ps -a --format '{{ .Names }} {{ .Image }}'
The result should be similar to the following.
demo-podman quay.io/podman/hello:latest
demo-docker quay.io/podman/hello:latest
Similarly, you can keep using Docker Compose for running containers on Podman. Using the same compose.yml file created before, you can run it on Podman using the Docker Compose CLI.
docker compose up
Even if using Docker Compose, the container is running on Podman. You can check its logs with the following command.
podman logs demo-podman
Troubleshooting
If you're on macOS and you have previously installed Docker Desktop, you might get the following error when using the Docker CLI on top of Podman:
Cannot connect to the Docker daemon at unix:///Users/<user>/.docker/run/docker.sock. Is the docker daemon running?
In that case, make sure you switch to the default Docker context with docker context use default and try again.
You can also control the current context and other options by enabling the experimental Docker Compatibility extension in Podman Desktop from Settings > Preferences > Experimental (Docker Compatibility). You'll then get a new tab in Settings > Docker Compatibility to control all the settings for using Docker with Podman.

Conclusion
Podman Desktop is an excellent solution for managing containers across different runtimes (such as Podman, Docker, and Lima).
If you're migrating from Docker, I recommend checking the blog post 5 things to know about Podman Desktop for a Docker user on the Podman Desktop website.
In this article, I covered the features related to container management and configurations relevant for Java development, but Podman Desktop can do much more than that.
It provides convenient features to work with Kubernetes. For example, you can start a new local cluster with kind, including the Contour ingress controller and the possibility to expose all your Kubernetes services to your localhost automatically. And it can be extended via plugins. For example, you can run an OpenShift cluster with one single click.
You can also run inference services with your favourite large-language model, and deploy AI workloads leveraging your machine's GPU.
Are you using Podman Desktop? What's your experience? I'd like to hear from you! Let me know on Bluesky or LinkedIn!
First version published on May 6th, 2023.
Cover picture from Pexels.